Sonic Alchemist User Guide
1. Welcome#
I am a supervising sound editor and re-recording mixer, and I have spent more than twenty years in film sound. Sonic Alchemist comes out of that work.
Sound design is interpretation. It asks for taste, memory, doubt and judgement, and most of it is spent being wrong on the way to being right — trying something, hearing why it fails, trying again. That is not waste in the process. That is the process.
But so much of the day has quietly become routine. We reach for the same keywords, retrace the same paths, and spend our hours searching, dragging, trimming, and tidying. None of that is the craft. It is the bookkeeping that grew up around the craft, and it is so constant that it is easy to mistake it for the work itself. The work was never the searching and the dragging. The work is the deciding — sitting with a scene until you understand what it needs, and knowing when it is finally right.
And the deciding suffers for coming last. An hour of searching changes the ear. What you choose then owes as much to fatigue as to taste. That is the true cost of the bookkeeping, and it is why this exists — not to hurry the work, but to leave you fresh for it.
The shape of a session is simple. Against picture, you draw each sound’s weight and intensity over time and set its keywords, and Build casts every layer from your own library, across the whole timeline at once. Tracks, trims and fades take care of themselves. You work in broad strokes or fine ones; a loose keyword and a shallow curve leave room for sounds you hadn’t pictured, and that is a compositional decision, not a shortcut. Then it opens in Pro Tools as a session, and you finish it there.
There is no model here and no dataset; nothing was trained on anyone’s work. It is deterministic signal processing, written in C++ and running offline on your own machine, in a few dozen megabytes. The interface is deliberately quiet — no floating windows, no popups, as few steps as possible between an idea and hearing it — and the engineering stays under the bonnet.
What is left, once the bookkeeping is gone, is the part I have loved for twenty years — and the part no tool should ever be handed.
Thank you.
Vytis Puronas MPSE
2. Installation and Licensing#
2.1 Installing#
Download the latest installer from the downloads page at sonomagic.com and run it. Sonic Alchemist is a standalone application for macOS and Windows — no plug-in, no host required.
The application ships without a bundled sound library — it is a small download, by design. Before you can build, you will point the application at one or more folders of audio on your own disk (see Library, Chapter 12).
What does arrive with it is intent rather than audio: three projects, eighteen recipes and four chains, installed to your Documents folder on first launch. They carry settings, not sound, so each one builds from whatever library you point it at.
2.2 Activating#
When you first launch the application, the activation screen appears. Paste the license key you received on purchase — a single key covers up to two machines you own — or, to try the application first, start a full-featured 14-day trial with your email.
Activation needs the internet once; afterwards the application runs offline. For a machine with no network at all, choose offline activation: you copy a challenge code to an internet-connected device, retrieve a response code, and paste it back. The screen guides each step. Everything to do with your licence afterwards — reviewing it, moving it between machines, activating offline — lives in Settings → License (16.6).
2.3 Your work stays on your machine#
Sonic Alchemist runs entirely on your computer. Your audio, your video, and your projects never leave your machine — nothing is uploaded, streamed, or collected. The small size is not a thin client calling home; the whole engine is on your disk.
It reaches the network in two cases only: to activate and check your licence, and — while the daily update check is left on — to ask whether a newer version exists (16.5). Nothing else. Once activated you can pull the network entirely and keep working.
3. Quick Start — your first scene in five minutes#
The shortest path from an empty window to a session in Pro Tools. Each step names the section that covers it in full. To hear the idea before doing any of it, open Thunderstorm from the Project Launcher, add your sounds (step 2), and Build (step 7).
- Open a project. In the Project Launcher, open one of the installed projects, or start your own with File → New (Cmd+N) (6.1, 17.1).
- Add your sounds. Open the Library tab and select Add Folder, or drag a folder of your effects onto the panel. It scans in the background, so you can carry on while it works (12.1).
- Load the picture. Drag a video onto the video panel, or select the clapperboard. The project takes its frame rate and duration from it (5.2, 6.1).
- Place events. Put the playhead on a moment and press 1 to 5 — Spot, Bloom, Contour, Fill, Scatter — or select the shape in the transport bar, where Bed has its own button beside Fill and [+] places a file of your own as a Clip. Each event arrives at the playhead as a marker in the Events lane (4.2, 6.3).
- Say what it is made of. Select an event and type into Keywords in the Event Inspector —
metal impact, or+metal -woodto require one word and exclude another (8.1, 11.1). - Draw a curve. Press D for draw mode, or hold Alt, and paint. Weight low is heavy, high is bright; Intensity is how the energy rises and falls. Curves smooth when you release (4.3, 9.5).
- Build. Press B, or the Build button. Every event is laid up from your library in one pass, and each one it builds is locked (4.4, 6.5).
- Play. Press Space. Cmd+click a region in the Audio lane to hear it alone (9.6).
- Re-roll a layer. In the Event List, select a built event’s row again to expand it, and use a layer’s previous and next arrows to step through its alternatives while the rest stays put. Like pins a sound you want to keep. For a whole new reading, unlock the event (Cmd+L) and Build again (4.8, 11.4).
- Export to Pro Tools. Open the Export tab, turn on Session with Format: Pro Tools, leave Handles on, and select the export button. Open the
.ptxin Pro Tools and carry on. For Nuendo or any other DAW, choose Format: AAF (14.1, 14.5).
That is the whole loop. A First Session (Chapter 6) walks the same ground with scenes and backgrounds added.
4. Concepts#
This chapter introduces the ideas the rest of the application depends on.
4.1 Intent, not files#
You do not place a file. Sonic Alchemist works one level above the files: you set an event’s intent, and sound from your library is laid up to match it. You are not searching for an audio file; you are building an event. The qualities you set — how heavy the sound is across the spectrum, how its energy rises and falls, what it is made of — are the controls. The files that satisfy them come from your library.
And not one file at a time. A search returns a file for you to place. A build searches your whole library for every layer of every event on the timeline at once — weighing each candidate against the layers already chosen and against the sounds either side of it — and lays the whole combination up together. Hundreds of events, several files in each, in one pass.
The word for it is casting. You don’t mould an actor. You write the part — this weight, this energy, this character — and then you look at who you have and find who fits it. You audition. You keep one, reject another, hold a third in mind. The material has its own nature, and the work is judgement about fit, not deformation. That is why there are no plugins here. Your material is chosen and placed, not processed. The one tool for tone is the one an editor already reaches for on a clip: each event has its own EQ, a cut at each end and two bells, which never touches your files and arrives in Pro Tools as the same Clip EQ (11.7).
4.2 Events and Shapes#
An event is a single piece of intended sound on the timeline — an impact, a whoosh, a complex movement, a background. Every event has a shape, which describes the kind of gesture it is. There are seven, presented in families.
The figure shapes are things that happen:
- Spot — a single, precise hit at one point in time. The simplest event.
- Bloom — a sound built around a sync point, with an energy envelope that swells and decays rather than landing as a single transient.
- Contour — a sound that follows a drawn movement over time: a rise, a transformation, a sweep with a complex spectral structure.
The ground shapes are what lies under them:
- Fill — a continuous background for a span of time — wind, rain, traffic, room tone — cast from your library. It follows the Weight curve, so it is a background that moves spectrally, shifting in character as the scene moves.
- Bed — a background that plays the files you choose, shuffled and crossfaded to length. Predictable, with no spectral movement (see 11.9).
Scatter stands on its own — a particle system of short hits from your sounds: rain, dust, rubble, gravel, anything that falls, bounces or breaks (Fall), and crickets, bees, crowds, crackle, traffic, anything that lives and calls (Swarm). See 11.13.
Clip is your own single file, placed as it is (see 8.5 and 11.1).
The family names come from figure and ground in perception: what you attend to, and what it stands on. In practice any shape can serve either purpose. The families describe how a sound behaves, not where it must sit in the mix.
One other distinction runs across them. Bed and Clip are fixed: they play the files you choose, exactly as chosen. The other five are intent: you specify what you want, and sound from your library is laid up to match.
You choose the shape; the shape determines which controls are available and how the event behaves on the timeline. You can change it after placing an event, within its family (11.1).
4.3 Weight, Intensity and Keywords#
Three things decide most of what an event sounds like, and they divide cleanly.
Keywords say what the sound is made of. Weight says where it sits in the spectrum. Type “metal impact” and the event draws from metal; aim the Weight low and you get a struck oil drum rather than a light tap on an empty can.
Weight is shown across five bands — Sub, Low, Mid, High, Air — but what you set is a smooth spectral focus, so you can aim between the bands as freely as on them. It is a curve rather than a fixed setting, so you can also draw it over time: one event travelling from one spectral quality to another.
Intensity is the energy of the sound over time — how it rises, holds, and falls. For a Contour it is the movement itself; for a Fill it can follow the picture. It also sets how many layers sound at once.
If nothing in your library matches an event’s keywords — a recipe written for someone else’s sounds, say — the event is still built, from its Weight alone, and the activity list says so (5.6), with Edit keywords and Clear keywords beside it. An exclusion on its own (-wood) never counts as “no match”: it only keeps that material out.
How each of them steers a build is covered in Chapter 8. If you would rather hear the difference than read about it, open Weight, Keywords and Curves from the Project Launcher and Build: it holds the same keyword at two weights, twice, before adding curves and exclusions.
4.4 Build#
Build is the core action. When you build, the application reads your events and their settings, retrieves matching sound from your library, and assembles the result — placing layers, assigning tracks, and writing fades — directly on the timeline. Nothing is written to disk until you export.
Build is non-destructive and repeatable. Each time it produces a result for an event, it locks that event, so your next Build leaves settled work alone and only builds what still needs building. To get a fresh variation, you unlock first — a single event, a selection, or everything at once — then Build again. Locking is therefore the normal state of a finished event, not a special action you take; see Locking (4.8).
4.5 Layers#
A built event is rarely a single file. It is usually several sounds, chosen to complement each other and balanced together — these are its layers. Opening an event reveals them, and a single row of controls per layer lets you audition each one, walk it through the alternatives that were ranked behind it, balance it, and pin or ban sounds to steer the build toward what you want. It has its own section (11.4).
4.6 Recipes and Chains#
A Recipe is a saved event — a preset you can place again at any playhead, in this project or any other. A name is proposed when you save, drawn from the Universal Category System and read from what the event actually contains, so a recipe arrives as Metal Impact rather than as something you have to invent — as does a group, and a chain saved from one. A recipe holds intent, not audio: each time you place it, the event is rebuilt from whatever library is loaded, so the same recipe yields material appropriate to the project at hand. (A Clip or Bed can be saved the same way; its recipe returns the same files you picked.) Recipes are also what Trace applies to imported moments, so a spotted hit can arrive already specified rather than blank.
A Chain is a saved group of events — several events that belong together, kept as one building block. A chain is how you store a small composed gesture rather than a single hit: a three-part impact (pre, body, debris), a vehicle pass assembled from approach, by, and away, a door with its handle, swing, and latch. Placing a chain drops the whole sequence at the playhead and rebuilds every event in it fresh from the current library — it is a re-assembly of the same intent, not a copy-paste of fixed audio, so each placement is a new variation on the same idea. A chain can hold other chains, so a sequence can be built from sequences. Saved once, a chain becomes a reusable signature you can carry across cues and across projects.
Recipes and chains are how your taste and your habits become reusable: a move you dialled in once, kept, and re-fitted to whatever the next scene — or the next episode — asks of it.
Eighteen recipes and four chains are installed with the application, so there is something to place before you have built anything of your own. Several are deliberately paired: Heavy Metal and Bright Metal are the same material at opposite ends of Weight; Water Swell and Deep Dive share their keywords, but Deep Dive requires +Underwater and sits darker. Placing a pair and building once is the shortest explanation of what each control does.
4.7 Scenes and backgrounds#
A Scene is a region of the timeline. Scenes give structure to a long timeline and, more importantly, they carry backgrounds. A scene’s background can be a Fill or a Bed. A Fill is searched from your library and stays alive — it shifts in weight and character across the scene. A Bed is a Fill with its ingredients fixed: rather than searching your library for the layers, you hand it the specific files you chose, and it shuffles, extends, and crossfades them to fill the scene as a Fill does. You set what it is made of, and it plays exactly that — predictable, without a Fill’s spectral movement. A scene can hold any number and combination of both. Either conforms to the scene’s length automatically: resize the scene and the background follows, with crossfades at the boundaries handled for you. Scenes and their backgrounds are covered in 11.8–11.9.
4.8 Locking#
Locking is how Sonic Alchemist protects work you have already settled. A locked event keeps its current built sound and is skipped by the next Build.
A successful Build locks the events it builds, so you can keep building a busy timeline without disturbing the hits you have already approved. The consequence is that, to re-roll an event into a new variation, you unlock it first, then Build. An unlocked event is rebuilt; a locked one is left exactly as it is.
You unlock at whatever scope you need. Unlock a single event or a selection from the inspector or the event’s context menu. To clear the whole timeline at once — when you want an entirely new pass — use the lock control beside the Build button, which unlocks every locked event in one move; the next Build then rebuilds everything. (Clip events — your own placed files — stay locked, because there is nothing to re-roll.)
4.9 The picture, and Trace#
Sonic Alchemist can read a video. Trace measures light and motion between frames and gives you a control curve and its transients — like a control voltage taken from a source on a modular. Use the transients to trigger events, or the curve as automation for a background. Each transient becomes a sync point. What you do with them, and what they end up sounding like, is yours.
It measures; it recognises nothing. You review what comes back, thin it to what you want, and import it. You can also import markers you have already made in Pro Tools and use those instead. Trace is covered in Chapter 10.
When the cut changes, drop the new version of the picture on the project. Sonic Alchemist finds where every shot went and moves your events with it, in one step you can undo (10.6).
4.10 The handoff#
A session ends in an Export: a Pro Tools session that opens directly, an AAF for Nuendo or any DAW that reads AAF, or a REAPER project. It carries the clips at their frame positions, the fades, the clip gain, the sync markers, and tracks laid out by bus. Or WAV stems, if you would rather lay them up yourself.
Sonic Alchemist gets you to a built, organised starting point. The editing, designing and finishing from there are yours.
The handoff also runs the other way. Months later, an AAF exported from your DAW can be brought back, and anything that originated here opens up into its events again (17.5).
5. The Interface#
The layout stays the same whichever tab is active: the video panel at the left, the active panel at the right, the transport bar and timeline across the lower half, the title bar and tabs above. There is no status bar: the timeline runs to the bottom of the window, and what the application is doing is one small button (5.6).
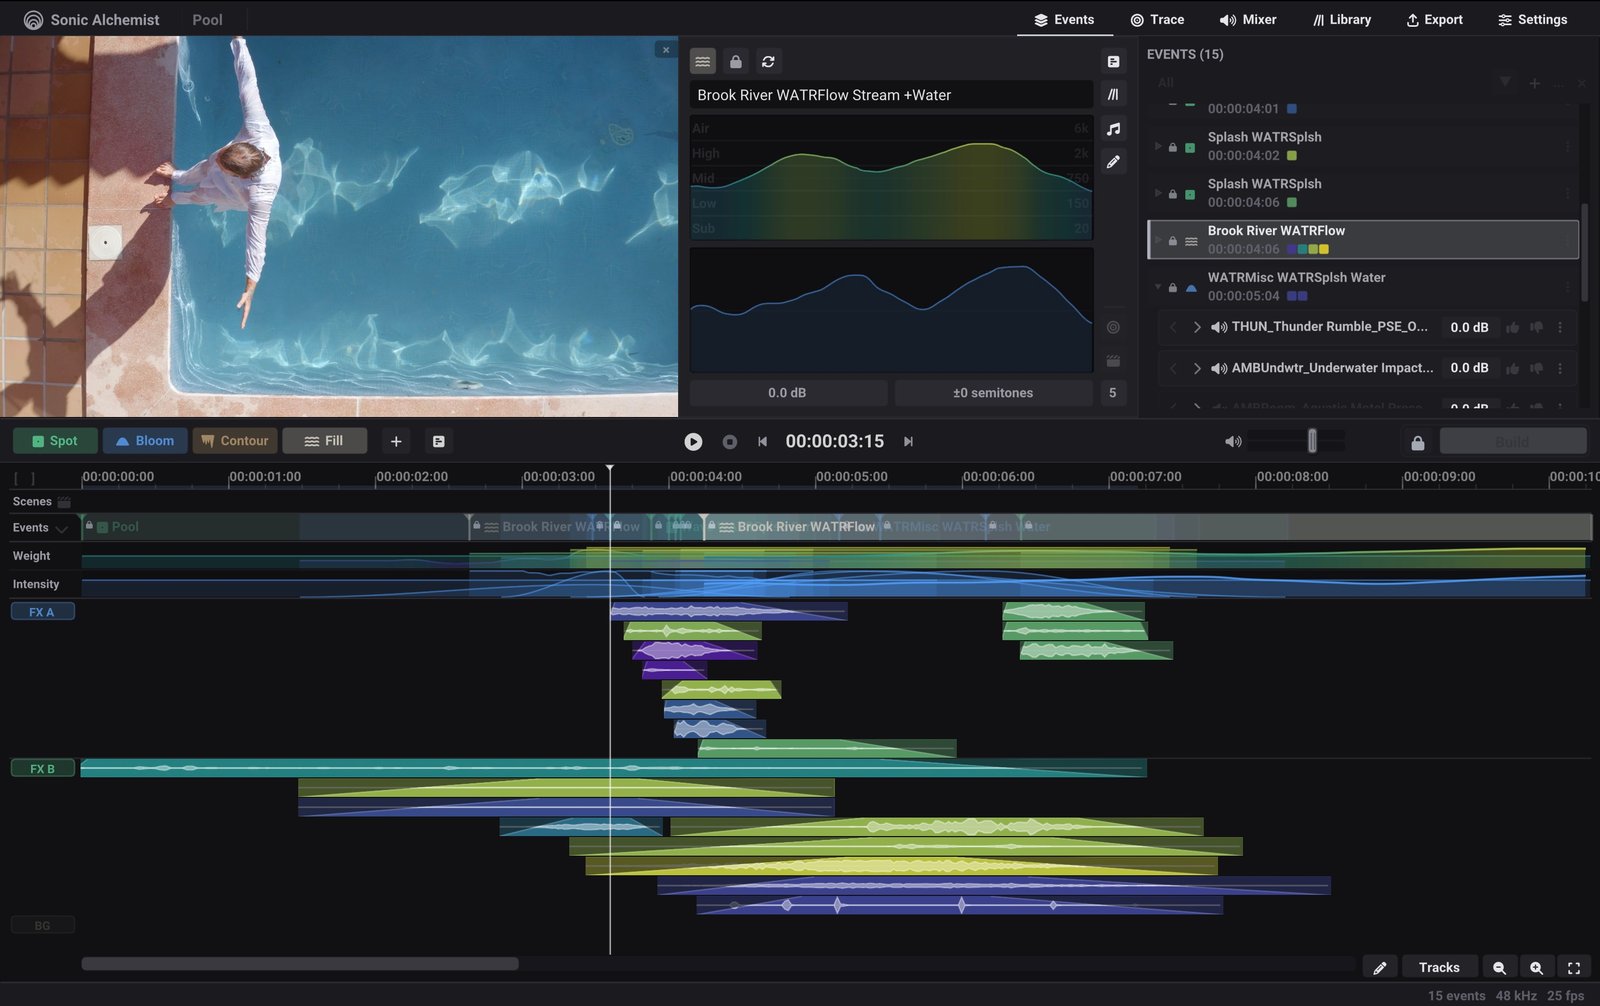
5.1 The Title Bar#
Across the top: the Sonic Alchemist brand mark on the left (select it to open the About dialog), the current project name when one is loaded, and the tabs on the right — Events, Project, Trace, Mixer, Library, Export, Settings. The active tab is underlined, and ⌘1 to ⌘7 (Ctrl on Windows) go straight to one. Selecting the active tab again returns you to Events.
If you start a new project or open another while you have unsaved changes, a small confirmation strip appears here with Save, Discard, and a cancel (×). Quitting or closing the window with unsaved changes asks the way your system does — on the Mac a sheet on the window (Save, Don’t Save, Cancel; the Dock icon bounces if Sonic Alchemist is in the background), on Windows a Yes / No / Cancel dialog.
5.2 The Video Panel#
On the left. Select the clapperboard to load a video, or drag one onto the panel; the × unloads it. The panel shows the frame at the playhead. While playing, it keeps time with the sound: each frame of the picture appears when its sound is heard, at the picture’s own frame rate, whatever that rate is.
ProRes, DNxHD, DNxHR and H.264, in mov, mp4, mxf, m4v, avi, mkv or webm.
Picture on a second display. With a second display connected — a monitor, a TV, the projector on a stage — press V, or select the screen icon beside the ×, and the picture fills that display. There is nothing to set up: no window to place and no display to choose. The main window keeps the whole of your screen for the work, and the Mixer takes the panel the picture leaves, so its tab steps aside until the picture comes back. Press V again, or the screen icon in the Mixer’s header, to bring it home. With three or more displays, V walks the picture across them before returning it.
The picture on the second display is the full picture, not a copy of the panel, and it stays in step with the sound through playback, scrubbing and jumps — even while a dialog is open.
The header of the Mixer says where the picture is and at what quality. NATIVE is the full picture; select it to switch to DRAFT, which decodes at half size and is lighter on the machine — worth it on a laptop, or with heavy 4K material. If frames arrive late during playback, the header counts them for that pass, so you know before anyone in the room does; Draft is the cure.
Unplug the display and the picture returns to the panel on its own, with a note in the activity list; reconnect it and the picture goes back. A choice made with V is remembered, so the next session opens the same way when that display is present.
Display Offset, in Settings (16.3), takes out a television’s or projector’s picture delay, once per display.
5.3 The Active Panel#
On the right. It carries the current tab: the Event Inspector and Event List, Project, Trace, Mixer, Library, Export, or Settings.
5.4 The Timeline#
The lower half of the window, always visible. From top to bottom it shows:
- the time ruler, with timecode and the work-area brackets;
- the Scenes lane;
- the Events lane, where event markers live;
- the Weight curve lane;
- the Intensity curve lane;
- the Audio lane, where the built audio regions appear, grouped by bus.
The timeline is covered in detail in Chapter 9.
5.5 The Transport Bar#
Between the active panel and the timeline. From left to right: the shape buttons, in three groups by family — Spot | Bloom | Contour, Fill | Bed, and Scatter (4.2); the [+] button, which places your own file at the playhead as a Clip; the recipe/chain placement button; the transport itself (step back, play/pause, stop, step forward) with the timecode display; the monitor fader with its VU meter and mute — previews (the Library, Material search, recipes, Trace, an Alloy’s drawers) play through it too; the lock button; and the Build button at the right. The lock button unlocks every event at once — and remembers which were locked, so a second click locks exactly those again.
Each shape button creates its event at the playhead. The number keys do the same — 1 Spot, 2 Bloom, 3 Contour, 4 Fill, 5 Scatter; Bed has no key. When the window is narrow, the shape buttons shrink to their icons.
Click the timecode to type a position: a full timecode (01:00:12:05, with ; before the frames for drop frame) or just the digits, which fill from the right — 1001205 is 01:00:12:05. Enter goes there; Escape leaves the playhead where it was.
The monitor fader sets your listening level and nothing else: it is not in the mix, not saved with the project, and never in an export. At unity it is exactly what exports. Click the speaker to mute. The project’s own master level is on the Mixer tab (13.1).
Previews sit where the sound will. An auditioned sound is levelled to the loudness target of the bus you are editing for — the selected event’s bus — and heard through that bus’s fader. A park ambience auditioned for a Bed on a quiet background bus plays as quietly as it will sit there, and a door slam for a Spot as loud, so you rarely ride the monitor fader between the two. With nothing selected, the last bus holds. Previews are never raised more than 12 dB and never pass -1 dBFS. The Preview fader, the slim fader beside the headphones at the top right of Material search, trims every preview on top of that, live while it plays, and leaves the monitor alone. Double-click it for 0 dB.
With no library loaded, the Build button reads Library and takes you to the Library tab.
5.6 Activity#
The first button on the timeline’s bottom row, under the track names, is Activity: everything the application has to tell you. It never opens on its own and never takes room from the timeline.
- While anything runs it shows progress, and when something finishes, a checkmark for a moment.
- Work that runs while you carry on — an export, a library scan, a picture update — has a progress bar beside it, named for the step (AAF, Stems, Scan). Click it to open the list, where the work can be stopped. While an export runs you can keep looking, listening and navigating; editing waits until the files are written.
- Work that holds the application — a build, opening a project, reading an AAF — shows a progress card in the middle of the screen with how far it has got, the time left, and Cancel (or Esc) where it can be stopped.
- A small cyan dot at its corner means there is something new to read; an amber dot means something failed, or a choice is waiting for you.
- Hover it to read what is happening, and how far, or what last happened: Exporting Harbor Night clip 12 of 40 30%, Exported Harbor Night, 14 files.
- Click it for the list, in the style of the application’s menus: one line per item, its actions at the right. What needs you comes first, marked amber — Auto-save available 14:22 with Restore and Discard, Files offline 3 with Relink, Activation pending with Retry; these leave by themselves once solved. Below a hairline come results, with a check — Export complete Harbor Night, 14 files with Reveal — and Clear under them. x dismisses a row.
- Keywords not found 28 events: the events whose keywords match nothing in the enabled libraries — each was built from its Weight alone. ‹ › steps through them, selecting each and bringing it into view, the Inspector ready to fix it; Select selects them all, for one Set keywords for all…; Library opens the Library tab, to enable or add the library they need. Click its name to list every event with its keywords; click one to go to it, its keywords selected in the Inspector, ready to retype. Its ⋮ menu has Clear all keywords. Each event leaves the list as soon as it is fixed.
The list keeps the current session. The timeline’s bottom row also carries a Delivery button when any bus declares delivery tracks (15.2), beside the pencil and Tracks; its tooltip gives the count (38 → 12 tracks, 4 folds). Click it to preview the delivery on the timeline (14.8).
Empty blocks. A block that has no sound — its file is offline or could not be read, or nothing in your library fits it — is drawn flat grey and named Empty, and it is silent. The Inspector says why on its layer row, and the activity list has the fix.
5.7 Menus#
File, Edit, Composition (the event and build commands), View and Help. Most commands also have a keyboard shortcut, listed in Chapter 18.
6. A First Session#
This chapter walks through a complete pass at a high level, so the pieces have a context before the reference chapters describe them in full. The short version of the whole workflow is: load picture, place events, specify, build, refine, export.
Three projects are installed with the application and sit at the top of the Project Launcher: Thunderstorm, Weight, Keywords and Curves, and Pro Tools Round Trip. To start your own, choose New Project. The quickest way to see the whole idea is to open Thunderstorm, add a folder of your own effects in the Library tab, and press Build. What follows walks the same ground from an empty project.
6.1 Start a project and load picture#
Create a new project from the launcher or File → New. Drag your video onto the video panel, or load it from the clapperboard. Loading a video sets the project’s frame rate and duration to match, and the playhead follows the picture as you work.
You do not need a video. You can work to timecode alone — set the duration in the Project tab (15.5) — or you can drive the session from Pro Tools markers (see 6.6).
6.2 Point at your sounds#
Open the Library tab and add a folder of your audio — the Add Folder button, or drag a folder in. Each file is read once and indexed into a palette: its spectral profile, its transient or sustained character, its pitch, its duration and channels, and its keywords (12.1).
You need at least one palette before you can build. What makes a good one is worth a minute of reading: see 12.7.
6.3 Place events#
- Spot, Bloom, Contour, Fill, Bed, Scatter — select the shape in the transport bar and the event is created at the playhead (5.5).
- Clip — the [+] button places your own file at the playhead.
- A recipe or a chain — the placement button beside it drops a saved event, or a saved group of events, arriving already specified (4.6).
- Trace — measure light and motion in the picture and import the sync points it gives you as events (Chapter 10).
- Pro Tools markers — import them and each becomes an event at its frame, carrying whatever its name specified (10.2).
Each event appears as a marker in the Events lane.
6.4 Specify the sound#
Select an event to open it in the Event Inspector (Events tab). Here you draw its weight and intensity, type keywords with include or exclude terms, choose which palette it draws from, and set its level, pitch variation, and pitch-to-scale. The more you specify, the closer the result comes to what you pictured; the more you leave open, the more room your library has to answer with something you had not. You can also apply a saved recipe to set everything at once.
6.5 Build#
Press the Build button (or B). Sound is laid up for your events and the results appear on the timeline as waveforms. Audition them, open events to inspect their layers, step through alternatives, pin what you like. A Build locks the events it builds, so to re-roll one into a new variation you unlock it and Build again; everything still locked is left alone. Repeat until the timeline sounds right.
6.6 Backgrounds and scenes#
For backgrounds, place a Fill and draw its intensity, or mark out a Scene and give it a background from the Set Background… chooser. A Fill is searched from your library and stays alive — draw a curve and it moves between heavy and light as the picture changes. A Bed is the fixed alternative — filled to the scene the same way, but from files you choose rather than search. Either conforms to the scene’s length, and you can stack more than one. This is covered in full in 11.8–11.9.
6.7 Export#
Open the Export tab, choose a session — Pro Tools, AAF or REAPER — WAV stems, or both, set your options, and export. Open the session in your DAW and carry on. That is the round trip.
7. Workflows#
The rest of this manual is a reference, one control at a time. This chapter starts from the job instead. Each workflow is a route through a common problem, with the sections that explain each step. None of them is the only way.
7.1 Backgrounds for a whole film#
A continuous, living background under every scene, that survives the recut.
- Cut the film into scenes in one pass. Play from the top and press Enter at every scene change, as you would drop memory locations. Name them now or later with Cmd+R. Scenes with the same name share a colour, so a location that returns is found at a glance (9.3).
- Give each scene its background. Right-click a scene, Set Background…. Choose a Fill when the background should breathe with the picture: it is cast from your library, moves with its Weight curve. Choose a Bed when you already know the files — a room tone, a designed location you carry from episode to episode. A scene can carry both: a Bed for what is constant, a Fill for the life on top (11.8, 11.9).
- Let the picture lead a Fill. Trace the picture, in the inspector’s tool column, writes the picture’s movement into the Fill’s Intensity curve, so the bed lifts and settles with the image. Draw over it wherever you want something else (11.1).
- Copy a location to where it returns. With nothing selected, Cmd+C on a scene copies its backgrounds; Cmd+V on the scene where the location comes back lays them there, fitted to its length (9.3).
- Build. Fills are cast; Beds already play.
- Let the structure hold it. Resize a scene and its backgrounds follow, crossfades included. When editorial sends a new cut, drop it on the project: every background follows its own shots, with nothing re-rolled (10.6).
- Deliver onto the background tracks. Keep Fill and Bed on their own bus — FX C out of the box — and declare the tracks the stage expects there (7.7).
Beds cost nothing to move or trim, and a file used in a dozen scenes is held in memory once, so a feature’s worth of backgrounds stays light (11.9).
7.2 Rain, debris, insects and crowds#
A cloud of many small sounds — rain on a roof, rubble after a blast, crickets in a field — with depth, movement and no repetition.
- Place a Scatter. Playhead on the moment, press 5 (11.13).
- Say what it is made of. Keywords as for any event:
rain roof,debris +concrete,cricket. Drag the Weight handle for the register — high for grit and drizzle, low for rubble and heavy drops. - Choose the voice. Fall for anything that lands; Swarm for anything that calls or moves.
- Set the density. Arc for a burst that peaks on the sync point — drag it onto the frame of the impact. Flat for steady rain. Drawn when the density should follow the scene: a shower that builds, a chorus that thins as a car arrives.
- Shape the matter. Debris: Bounce up, so hard hits break into smaller pieces, a short Length, Attack: Sharp. Drizzle: little Bounce, some Float. Insects: Swarm, Life high for a chorus, Float low so they stay in the grass. Bees and pass-bys: Float high and a Speed to match.
- Pan it. Press P for the Panner. The middle fills the whole room, a wall that half, a corner that quarter. In surround every particle has its own direction, and what flies is heard above you (11.6, 11.13).
- Layer clouds. One Scatter is one kind of matter: a long, light drift under a short, heavy burst; a far chorus and a few creatures close. Group them (Cmd+G) and save the group as a chain, and the next explosion starts there (4.6).
For a game, the same Scatter exports as a set of seamless loops, each a fresh roll (7.10).
7.3 A designed impact#
A hit that lands on its frame, with weight, body and tail, that you can use again.
- The body. Press 1 for a Spot on the frame. Keywords for the material (
+metal impact), Weight low for weight. If the moment turns on it, mark it Hero: everything around it makes room, and it is among the last things folded at delivery (8.8, 11.1). - The swell and the tail. A Bloom with its sync point on the same frame, its Weight drawn from dark at the hit to brighter in the tail — one event that opens like a real decay (8.5).
- The debris. A Scatter on Fall, with some Bounce, so the fragments land after the hit (11.13).
- Steer it. Expand each event and step a layer through its alternatives. Like what you want to keep; Ban what you never want to hear again on this job (11.4).
- One object, not a stack. When the layers should read as one sound rather than three, make the Spot an Alloy: its sounds become three bands under one movement (11.11).
- Keep it. Group the events and save them as a Chain. Placed again, it rebuilds from your library — the same idea, a new take every time (4.6).
7.4 Whooshes, rises and transitions#
A sound that travels — into a cut, past the camera, up into a reveal.
- Into a cut. Press 2 for a Bloom at the cut, type
whoosh, and drag the sync point so the peak lands on the cut (11.1). - A sound that changes as it travels. Draw the Weight from dark to bright, or bright to dark. Each region of the curve is a different sound, crossfaded where the curve moves — one gesture, not a patchwork (8.5).
- Your own movement. Draw on a Bloom’s Intensity curve on the timeline and it becomes a Contour: the rise, the hesitation, the snap, as you draw them (9.5).
- The movement of something you already have. A guide vocal, a temp effect, a sound you made with your mouth: place it as a Clip, right-click it and choose Trace into New Event. The Contour takes its length, its attack and its curves, and is built from your library — its gesture, never its sound (11.12).
- One object travelling. Make it an Alloy to hear one thing moving rather than layers crossfading (11.11).
7.5 Spotting a reel from Pro Tools markers#
You already know where every sound goes. You want the events to arrive specified.
- Mark in Pro Tools. Drop memory locations on the frames and name them — a recipe name (
Sword Hit), or a shape, a band and keywords (bloom, low, +metal -ring). A marker namedScene, Rooftop, wind citymakes a scene (10.2). - Export them. File → Export → Session Info as Text. Match the frame rate and start timecode to your project.
- Bring them in. In the Trace tab, Markers → Choose File…. Check them on the timeline, give the blank ones a recipe with Apply a recipe…, and Import Events (10.3–10.5).
- Bring the track layout too. In the Project tab, Import track list… from the same session, so the delivery lands on the tracks you already have (15.3).
- Build, steer, and export with Format: Pro Tools (14.1).
REAPER works the same way, straight from the .RPP (10.2).
7.6 When the cut changes#
Editorial sends v5. Your work should follow it without a conform pass.
- Drop the new picture on the project. With Picture Conform every event, scene and background moves to where its picture went. If editorial sent an EDL or an Avid change list, drop it with the picture; it confirms the match (10.6).
- Look at what needs a look. The ruler shows new picture in red and changes to check in yellow. Shift+Down steps through them.
- Fix what crosses a changed edit. Right-click an event that ran across one and choose Fit to Cut: it is cut at the edit, and each piece goes where its picture went.
- Rescue what was cut out. Removed events are never deleted. They wait after the end of the picture, under a scene named for where they came from. Drag back what you still want.
- Fill the new picture. Red on the ruler is picture with no sound yet. Build there.
One Cmd+Z undoes the whole update.
7.7 Delivering to the mix stage#
The stage has a track layout. Your work has to arrive in it, with nothing lost.
- Get their layout. Ask for the session’s Session Info as Text and use Import track list… in the Project tab — or declare it by hand on each bus card: six mono, four stereo, one 5.1. Save it under Layouts so everyone on the show works to it (15.2, 15.3).
- Work at whatever width the scene needs. The declaration never limits the timeline.
- Hear the delivery before you export. The Delivery button at the bottom of the timeline shows the count —
38 → 12 tracks, 4 folds. Click it and listen: if a fold costs you something, you hear it now, not on the stage (14.8). - Decide what must stay separate. Mark the hits that carry a moment Hero; they are the last to fold. Where a bus runs red, raise its declaration, or Bounce to Clip the moment yourself (11.10).
- Export a Pro Tools session. Tracks in folders by bus, in their colours, with clip gain, fades and Clip EQ (14.1). A
delivery.txtbeside it tells the mixer what folded and why, and every folded clip can still be opened back into its layers.
7.8 Surround on the mix stage#
The stage works in 5.1 or 7.1. Some of your sounds should arrive panned; others the mixer will want to pan on the stage.
A session carries no pan automation (8.12). What you pan in the Panner reaches Pro Tools in one way: written into the audio of a declared 5.1 or 7.1 track. So the tracklay is where you decide what arrives panned and what stays open.
- Bring the stage’s layout in. Import track list… from their Session Info as Text brings their 5.1 and 7.1 tracks in as 5.1 and 7.1 slots on your bus cards. Or declare them by hand: a backgrounds bus of four 5.1 tracks, an effects bus of eight mono and four stereo (15.2, 15.3).
- Split by what the mixer will do.
- On declared 5.1 or 7.1 tracks: backgrounds, Scatters, ambiences and the large designed moments. Each layer’s panning is written into the track, and a Scatter keeps every particle in its own direction — something no pan automation could carry.
- On mono and stereo tracks: the hard effects the mixer will want to pan. They arrive as they are — mono in the centre, stereo on left and right — and are panned on the stage.
- Pan in the Panner (P). An event you leave untouched plays as it is: mono on C, stereo on L and R, a multichannel file on its own speakers (11.6).
- Listen to the delivery. Click Delivery at the bottom of the timeline. A fold on a surround track is summed with its panning, so what you hear is what arrives (14.8).
- Export. Format: Pro Tools, Channels: Conform to layout, Tracks: Multichannel, Handles and Clip gain on. Each declared 5.1 track arrives as one 5.1 track, every speaker a real file, with its handles, fades and clip gain. Open the
.ptx, or bring it into the stage’s own template with Import Session Data (14.1). - A printed reference, if wanted. WAV Bounce → Stems with Layout 5.1 or 7.1.4, and Wet stem for the reverb (14.2, 14.4).
To re-pan a sound for the stage, pan it here and export again, or deliver that sound on a mono or stereo track. A 7.1 track has no height speakers: height reaches a delivery only in 7.1.4 or AmbiX stems and mixes. For a Dolby Atmos session, deliver to mono and stereo tracks, and the stage places every layer as an object or in a bed.
7.9 Opening old work back up#
Months later a sound, or a whole session, comes back, and you need to change it.
- One sound. Drop the delivered file on the timeline and right-click it. Unbounce to Source opens it into the exact layers it was printed from; Unbounce to Recipe builds the same intent again from your library, on any machine (11.10).
- A whole session. Export the session from Pro Tools as an AAF and drop it on Sonic Alchemist. Everything that originated here opens back into its events, where it now sits; everything else arrives as Clips (17.5).
- Keep it openable. Keep the filenames an export gives you, and keep the exported audio rather than re-rendering it elsewhere. Turn on Source record in delivery folder when the work will travel to machines that have never seen the project (16.1).
7.10 Variations for a game#
One designed sound, many takes, named and tagged for the middleware.
- Design it once — an event, a stack or a chain.
- Lock what carries its identity. A locked layer stays in every take; the rest re-rolls (14.7).
- Export Variations from the right-click menu: a count, a name proposed from UCS, the sample rate, the channels, dry or with reverb.
- Loops for ambiences. Choose loop and every take is a different seamless loop, for a random container of rain or crickets.
The files land in the project’s Variations folder, named and tagged, ready for Wwise or FMOD.
8. How Your Inputs Become Sound#
What happens between pressing Build and hearing a result — the logic, not the internals.
8.1 What an event asks for#
When you build an event, the engine reads everything you have set on it — shape, keywords, the Weight and Intensity curves, the chosen palette, and the level and pitch variation — and uses all of it to choose sounds from your enabled library and assemble them into layers. Nothing is invented; every layer is a region of one of your own files, trimmed, placed, and balanced.
Two of your inputs do most of the steering (4.3). Keywords filter and rank your library by name, path, and embedded description, and their operators are exact: a plain word matches that whole word, a + word is required, a - word is forbidden. Wildcards widen the match where you want it: wind* catches anything starting with wind (Wind, Windshield), *wind anything ending in it (Rewind), and *wind* the run of letters anywhere. Weight is matched against the spectral profile measured for every file when you indexed it. Used together they are precise: +metal finds your metal, and Weight drawn low takes the heavy end of it. Used loosely they are generous: a single word and a shallow curve leave the field wide, and what returns may be something you would not have thought to ask for.
8.2 How a sound is chosen#
For each layer, every eligible file in your library is scored, and the best candidates are drawn from the top of that ranking, with enough variation that re-rolling an event gives you genuine alternatives rather than the same file every time. Several considerations enter the score, and knowing them tells you what to adjust when a result is not what you wanted:
- Keyword fit — how well the file’s name, path, and description satisfy your terms. A missing required term or a present excluded term removes the file entirely.
- Spectral fit — how closely the file’s measured spectral balance matches the Weight you drew, so material in the wrong register is passed over.
- Duration fit — whether the file is a sensible length for the event; a two-second hit is a poor source for a ten-second swell, and the reverse wastes most of the file.
- Character fit — whether the file’s transient or sustained nature suits the shape and the intensity. A sharp, fast file suits a Spot at high intensity; a smooth, evolving file suits a Fill or the body of a Bloom.
- How it sits with the layers already chosen — see complementary layering, below.
If you are getting the wrong material, the fix usually follows the list: wrong stuff is a keyword problem; right stuff but wrong tone is a Weight problem; right tone but awkward timing or length is a duration or shape problem.
8.3 Complementary layering#
An event is usually several layers, and they are not chosen in isolation. Once the first layer is placed, each further one is chosen for what it adds to the layers already there — the engine reaches for material that fills the spectral space the existing layers leave open rather than crowding a band that is already full, and it favours variety of colour across the stack, so a blend mixes tonal and noisy elements rather than doubling the same quality. A blend reads as richer that way. All of this happens inside the register you drew: complementing chooses among sounds that already fit the Weight, and never reaches for a brighter sound to fill a heavy event, or a heavier one to fill a light event. The practical result is that a built event tends to be a balanced combination rather than three copies of the same thump, and that balance happens on its own. To make an event denser or sparser, reach for Intensity (below) rather than stacking layers by hand.
8.4 How many layers — Intensity and polyphony#
How many layers an event carries is set mainly by its Intensity: the more intensity at a point, the more layers are allowed to sound there, up to a deliberately low ceiling — lifted a little for events you mark as Hero. An event that sounds cluttered wants less Intensity, not more.
8.5 How each shape is built#
The shape is not just a label; it changes how layers are placed in time.
- Spot samples the Weight at the sync point and places its layers there as a single coincident hit.
- Bloom reads its peaked Intensity curve as an envelope, and uses the Weight curve to morph across time the way an editor would cut it: a small palette of sounds, one for each region of the spectrum the Weight curve visits, with crossfades from one to the next wherever the curve travels — long where it moves slowly, short where it moves fast. The Intensity curve sets how many layers play and how loud; the Weight curve decides which sound is playing — no layer is turned down for being off the curve. A curve that wavers within one colour stays one sound, while a deliberate excursion, even a brief drawn peak, is heard at its moment. Where the curve leaps a long way at once — from a sustained sub straight to the air — the change is bridged with material from the middle of the spectrum, so it does not jump from rumble to hiss. This is what lets a Bloom open dark and bloom bright within a single event, as one gesture rather than a patchwork of clips.
- Contour works like Bloom but follows the freeform Intensity and Weight curves you draw, rather than a single peak — the same palette-and-crossfade mechanism, conducted entirely by your hand.
- Fill builds a continuous bed for the whole event, shuffling and crossfading regions of your source material to avoid audible repeats, with layers coming in as the Intensity curve rises — a rising tide, so a bed thickens and thins with the scene. Wind, water, rain, traffic, foliage: draw the Intensity and let it carry a single background through a whole scene, building and easing without a seam.
- Scatter is a particle system: a cloud of short hits from your sounds, each with its own moment, force and place. Its Intensity curve is how many land or call per second, its Weight which sounds, and a handful of physical controls how they fall or fly. It has its own section (11.13).
- Clip is your own file, placed directly with no matching and no re-rolling — the one event you can trim and fade by hand, because it is your material rather than a built result.
- Bed is, like a Clip, your own material rather than a matched result — a set of files filled to the scene the way a Fill is, shuffled and crossfaded to length, but fixed by you rather than searched. Nothing re-rolls; one layer per file, its Intensity curve acting as plain volume. It is how you carry a designed location across a series — the same layers, episode to episode.
8.6 How a source region is chosen and trimmed#
A chosen file is rarely used whole. The engine selects a region of it appropriate to the event. For a Spot it finds a discrete hit within the file and aligns its onset to your sync point. For a Bloom or Contour it slides a window across the file and picks the stretch whose energy shape best matches the curve you drew, so a swell is filled with material that actually swells. For a Fill it takes material from across the file to avoid repetition. A short tail is kept beyond the event for the fade.
8.7 Fades and how clips are joined#
Fades are a craft of their own and every editor has their own way with them. What happens here is not meant to replace that; it is meant to save you doing it twice.
Lengths and shapes are derived from the material rather than set to a fixed value. Each layer’s onset and decay are measured and the fade fitted to them: transient material keeps short fades, sustained material longer ones, and on a Spot the fade-in cannot reach past the measured onset.
You are not meant to tune these by hand at this stage. Export with handles and they arrive as real, editable crossfades in your DAW, where that work belongs (14.1).
The exception is a Clip — your own file rather than built material. You shape its fades yourself, on the timeline (11.1).
8.8 Deconfliction — keeping a busy timeline clear#
Deconfliction does a first pass of what a mixer does by hand on a dense timeline, on every build, without your having to hold it in mind.
It works in three ways. It separates timing — layers that would land within a hair of each other are nudged apart by a few milliseconds, so each transient is heard on its own. It shares out the spectrum — moment by moment, one layer takes the lead in each frequency band and competing layers ease back a touch there. And it contains density — across sustained busy passages it restrains the quietest, least essential layers so the stretch stays legible. All of it is level and a few milliseconds of timing: nothing is filtered, and your files are never touched. It reaches your DAW as clip gain or volume automation you can see and change.
You steer it by deciding what matters. Mark an event as a Hero (its priority control) and it is treated as the one that must come through: it keeps its place in the timing pass and claims the lead in the spectrum, while everything around it makes room. The hits you care most about stay clear; the supporting material yields to them rather than competing. So the control you actually operate is editorial, not technical — you tell it which sounds carry the moment, and it protects them. It runs on every build, and every export is deconflicted.
8.9 Variation and reuse#
Re-rolling an event gives you real alternatives because selection is varied, and because the engine actively avoids reusing the same file: a source already used in the same event will not be chosen again, and a source used recently nearby on the timeline is strongly discouraged, with the discouragement easing as distance grows. This is why a row of similar events does not collapse onto one favourite file, and why your library’s breadth shows up as variety in the result. If you want a specific file every time, pin it on the layer; if you never want one, ban it (see 11.4).
8.10 Pitch#
Two pitch behaviours can apply, both optional. Pitch variation (per event) spreads layers randomly across a range you set, for thickness and to avoid identical pitches stacking. Scale quantisation (a project setting) nudges each clip’s detected pitch to the nearest degree of a scale you choose — useful with tonal material such as metals and resonant impacts, where you want a stack to agree musically. Both are varispeed, as on tape: pitch and duration move together, with no time-stretching. An event’s sync is preserved through the change.
8.11 Fidelity and headroom#
Everything runs in 32-bit floating point and is written as 24-bit at export.
Sample-rate conversion and pitch shifting use a band-limited resampler, so a pitched-down hit keeps its transient and a project running at a rate different from your interface is converted cleanly. Files at another rate than the project are converted flat to 20 kHz, with nothing above the project’s range folding back below it — a 96 or 192 kHz library plays cleanly in a 48 kHz project, and a Clip pitched up keeps the same guard.
When several layers combine, their levels are compensated so the energy of the blend stays consistent. Loudness normalisation sets the busses at working relative levels (15.4), measured the way a broadcast meter measures and held below peak.
Sonic Alchemist never clips. Nothing it plays and no file it writes is ever clipped, however hot the source, the faders or an EQ boost (11.7). The finished sound — playback, a bounce, the WAV mix — passes an always-on limiter, the same one in all three, peaking at −1 dBFS. A file that is part of something is never limited, because a limited stem no longer adds up with the others. A file that fits is written exactly as it is; only one that would clip is written lower, to −1 dBFS, and its level travels with it:
- Session media (AAF, REAPER, Pro Tools) — the clip’s gain is raised by exactly as much, so in your DAW it plays exactly as you heard it. With the EQ option off a hot library sound still goes over untouched: on its own it never clips.
- WAV stems and tracks — one gain for the whole set, so they still sum to the mix; Activity names it (“stems and tracks written 2.4 dB lower so none clips”).
- WAV clips — each lowered on its own; Activity counts them.
Playback starts and stops with a soft fade rather than a hard cut. It is monitoring only and reaches no export.
8.12 Panning, and what you hear#
Every event plays from a position on its Panner (11.6), and an event you have not touched plays as it is: a mono sound in the centre, a stereo sound on left and right, a multichannel sound channel by channel — what any DAW does with a file dropped on a track. Nothing is panned for you, and the bus a sound lives on has no bearing on where it sits. To put a sound anywhere else, move it yourself in the Panner.
The position is held without reference to any particular set of speakers. Stereo, the surround layouts, ambisonic and headphones are decodes of the same description, so the monitor and the file agree. Nothing is upmixed.
A session — Pro Tools, AAF or REAPER — carries no pan automation. Where a layer arrives on a mono or stereo track it arrives as it is, and you pan it there. Panning travels only where it has to be written into the audio: on a declared 5.1 or 7.1 track, where each layer’s channels land on the speakers its Panner chose, and inside a folded clip (14.8). For a Dolby Atmos session, deliver to mono and stereo tracks: every layer arrives on its own track, unpanned, to become objects or beds on the stage (14.3).
Panning is routing and gain — a layer that lands in the surrounds is the file you gave it, at a different level, on a different channel. Nothing is filtered, decorrelated or widened. LFE is never synthesised; it appears only where a source carried one of its own.
9. The Timeline#
The timeline is where events, curves, and built results are displayed and edited. It is always visible, beneath whichever tab is active.
9.1 Navigating#
- Zoom with the mouse wheel or the trackpad (anchored at the cursor), the magnifier buttons at the bottom right, or T and R. Fit (the maximize button, or Cmd+0) frames the whole timeline; in draw mode it frames the selected event.
- Pan by dragging the horizontal scrollbar or holding the middle mouse button and dragging.
- Scrub by clicking or dragging on the time ruler; this moves the playhead.
- All time operations snap to the nearest frame.
Audio Focus (A, or the button at the bottom right) zooms to the selected event’s audio, horizontally to its time range and vertically so its tracks fill the height. Press A again to return to the view you had; with nothing selected it frames the whole timeline. It is momentary by default — select another event and the view pops back. Turn on Follow selection in Settings (16.1) and it latches instead, keeping its zoom and panning to reveal each event as you move between them, zooming out only when one does not fit.
9.2 The work area#
The work area is a span you define with the [ and ] brackets on the ruler (keys I and O set them at the playhead, and pressing either again while the playhead sits on that point clears it; X clears both). It marks the region you want to act on — saving a scene from it, for instance, or exporting one reel of the film when the others have gone already. Drag the brackets to adjust the span. Only I and O (or the brackets) set it: selecting a scene does not, and once a work area has become a scene it clears itself.
9.3 The Scenes lane#
Scenes are regions that structure the timeline and carry backgrounds.
Scenes in one pass. Play the film and press Enter (or keypad Enter) at every scene change, the way you would drop memory locations in Pro Tools. Each press is a cut: inside a scene it splits it in two, and anywhere else it starts a scene that runs to the next one or to the end. Nothing asks for a name. With a work area set, Enter turns that range into a scene instead and clears the work area, ready for the next I and O. Left and Right step the playhead from cut to cut, and a click on the ruler near a cut lands exactly on it — so the end of one scene is one key away when you start the next.
A location that returns. With no event selected, Cmd+C copies the backgrounds of the current scene (the one you clicked, or the one under the playhead). Go to the scene where the location comes back and press Cmd+V: the backgrounds land linked to it and fitted to its length. Beds play at once; Fills keep their sounds and settings and are made on the next Build. If that scene still has a number for a name, it takes the source scene’s name — and with it the location’s colour. Each copy is its own from then on: change one and the others stay as they are.
Each scene has its own colour, and a cut is one solid line in that colour from the ruler to the bottom of the tracks. Scenes you have not named (“Scene 7”) are numbered in time order and step through the colours; scenes with the same name share one, so a location that returns later in the film — every “Park” — is found at a glance.
You can also arm the scene lane with the clapperboard control in its header, then drag across the lane and name the scene inline; or set a work area and press S to create and name one. With nothing selected, S arms and disarms the lane — the same toggle as the clapperboard. Drag any cut in the Scenes lane to move it; where one scene ends and the next begins, both move together (cuts snap to nearby scenes). The context menu also offers Split at Playhead, Rename, Set Background… (see 11.8), and Delete. When zoomed in, navigation arrows appear to jump between scenes.
Selecting a scene. Click a scene to select it: it lights up in its colour, and Build (B) builds just that scene. To rename it, double-click it, or press Cmd+R (Ctrl+R on Windows) — the name field opens on the selected scene, or on the one under the playhead, even when the scene is too narrow on screen to show its name. Return keeps the new name; Esc keeps the old. Selecting a scene never limits an export and never dims the timeline. Move the playhead out of the scene — a click on the ruler, Left or Right — and it lets go; Escape does the same.
9.4 The Events lane#
Each event is a marker showing its sync point, shape icon, and name, plus small indicators for lock state and scene-link. A muted event’s name is struck through. Drag a marker to move it (frame-snapped); drag its right edge to change its duration. An event linked to a scene shows a “no entry” cursor when you try to move it — unlink it first.
Expanding the lane. Press E, or the arrow beside the lane’s name, and the Events lane expands to fill the whole track area. Overlapping events are unstacked onto their own rows, so each can be selected, moved and resized directly. The Weight, Intensity and Audio lanes are hidden while it is expanded. Press E again, or Esc, to collapse.
Stepping through events. Up and Down move the selection to the previous and next event in time order, taking the playhead to each event’s sync point and panning the view when the event is not already on screen. Hold to repeat. With nothing selected, Down selects the first event and Up the last.
9.5 The Weight and Intensity lanes#
These show the curves for your events. In normal view they display the curves of all events; with a single event selected and draw mode active, the Weight lane shows its five bands (Air, High, Mid, Low, Sub, labelled with their frequencies) so you can paint directly. Hold Alt to paint a curve without entering draw mode, or toggle draw mode with the pencil button or D. Curves are smoothed when you release.
Drawing on a Bloom’s Intensity curve turns it into a Contour, its arc the start of the drawing — you never have to delete a Bloom to draw it (11.1).
9.6 The Audio lane#
The built audio appears here as audio regions, grouped into labelled lanes by bus.
Each bus has a show/hide tab in its lane header: the busses you leave showing share the height between them, and hiding one gives its space to the rest. It changes only what is on screen; nothing is muted or soloed. Only when the busses showing cannot fit at a workable height does the lane scroll: a thin scrollbar appears on the right, and the wheel over the bus names, or Shift with the wheel over the regions, moves it. A session that fits never scrolls.
These regions are not hand-editable here. The trims and fades written for you are already fitted to the material (8.7), and reshaping an individual edit is what the AAF’s handles are for (14.1). What you do here is listen and judge:
- Audition a single region with Cmd+click. Playback stops on its own at the end of the region.
- Select by clicking, or lasso several by dragging on empty space; Shift adds to the selection.
- To change a region, change the event behind it — step its layers through their alternatives (see 11.4), adjust its Weight or keywords, or re-roll it — and Build again.
The exception is a Clip event, which you can trim and fade by hand (11.1).
9.7 The bottom controls#
At the bottom of the timeline: Activity and its bar (5.6), under the track names; the scrollbar, from where the timeline begins; the pencil (draw-mode toggle); the view-mode cycle, which steps through vertical zoom options; and the zoom and Audio Focus controls.
9.8 Selection and editing#
- Click selects; Shift+click extends a range; Cmd+click toggles one item.
- Drag on empty space to lasso.
- Group a selection with Cmd+G, ungroup with Cmd+Shift+G.
- Lock or unlock with Cmd+L; mute with M; delete with Backspace or Delete.
- Nudge a selection one frame with the comma and period keys (hold to repeat).
- Every edit is undoable (Cmd+Z / Cmd+Shift+Z).
10. Trace#
Trace places a timeline’s worth of events in one pass, from one of two sources: the picture, or markers you have already made in Pro Tools.
From the picture it measures light and motion between frames and gives you an envelope and its transients — a video signal, and a set of sync points derived from it. It measures; it recognises nothing. Everything it returns is a proposal you accept, reject or adjust.
The two sources suit different work. Read the picture when the cut is busy and you want a first scattering of events to work from. Import markers when you already know exactly where the sound goes and want frame-accurate placement. Many sessions use both.
Trace is a placement tool. What those events sound like is set by the recipe you assign and the work you do afterwards in Events.
10.1 Reading the picture#
What it measures. Light — how bright each frame is — and motion, how much the image changes between frames. The two combine into a single continuous signal across the clip, and its transients become the marked moments.
The threshold is not a fixed level: the read adapts to the material, so a busy sequence yields its largest hits while a quiet one registers a small gesture. You get a workable scattering of candidates either way rather than hundreds of marks in the loud parts and none in the quiet ones.
Running it. Open the Trace tab. The Picture card runs the read: Read uses the video you have loaded, and offers to Load a Video when there is none. Loading a video starts the read on its own, so usually there is nothing to press. A read takes roughly the length of the clip, depending on resolution, and reports where it has got to while it works — a percentage, and the position it has reached in the clip. The X in the card’s corner stops it, and a read you have stopped stays stopped until you ask for it again.
When it is done, the card says how many moments it is offering — a count that follows the waterline as you drag it (10.3) — and the result is drawn as an overlay on the timeline. If the picture is too still to yield clear moments it says so and offers you another video, since re-reading the same one would find the same nothing.
10.2 Importing markers from Pro Tools or REAPER#
Instead of, or alongside, reading the picture, you can import the markers from a Pro Tools session. This is the most precise way to drive placement: you decide every moment in Pro Tools, and Sonic Alchemist places to it exactly.
A session to try this with ships with the application: the Pro Tools Round Trip project folder holds a Pro Tools session, its text export, and a Read Me with the steps.
Exporting the file. In Pro Tools, drop memory-location markers where you want events — on the frame the sound should land — then choose File → Export → Session Info as Text. You do not need to change the defaults; Sonic Alchemist reads the session’s sample rate and timecode format from the file’s header and the markers from the markers listing. Match the session’s frame rate and start timecode to the project you are building in Sonic Alchemist; a mismatch is the usual reason imported markers land off by a constant offset.
Naming the markers — the part that does the work. A marker’s name is not just a label; it is read as a short instruction for the event that marker becomes. It lets you spot a whole sequence in Pro Tools and have the events arrive already specified.
A marker name is read left to right, and each word is interpreted by what it is:
- A recipe name (matched first). If the marker’s name — up to the first comma — matches the name of a recipe you have loaded, that recipe is applied, and anything after the comma refines it. Name a marker
Sword Hit(a recipe you have built) and the event arrives fully formed. Example:Sword Hit, +metal -wood. - A shape word —
spotorbloom— sets the event’s shape. (Contour and Fill are shaped by their curves in the app rather than named at import; a marker that names one is flagged for you on review so you can finish it in Events.) - A band word —
sub,low,mid,high, orair— sets the Weight, placing the event’s spectral centre in that band. - Everything else becomes keywords, and keywords keep their operators: a bare word matches that whole word,
+wordrequires it,-wordexcludes it, and wildcards work here too —wind*,*wind, or*wind*.
So bloom, low, +metal -ring reads as: a Bloom, weighted to the low band, drawn from metal, never ringing. A bare metal impact with no shape or band word becomes a Spot drawn from metal, at a default mid-low weight. Order is forgiving — the parser takes the first shape word and the first band word it finds and treats the remainder as keywords — but writing them in the order shape, band, keywords keeps your marker lists readable.
Scene markers. A marker whose first word is scene defines a Scene rather than an event: Scene, Rooftop, wind city creates a scene named “Rooftop” carrying the keywords that follow. This lets you lay out a whole scene structure from Pro Tools alongside its hits.
From REAPER. Choose the REAPER project itself (.RPP) — there is nothing to export first — or a marker list saved from REAPER’s Region/Marker Manager (.csv). Markers and regions are named with the same grammar. A region gives its event a length as well as a place: the event spans the region exactly, whatever its shape or recipe would otherwise make it. Positions are measured from the start of the REAPER project, as Pro Tools markers are from the start of the session.
In Sonic Alchemist, load the file from the Markers card in the Trace tab (Choose File…) or from File → Import Markers…; either way the timeline zooms to fit what arrived. Each marker becomes a reviewable moment on the timeline, already carrying whatever its name specified — ready to confirm and import as an event. The card then names the file they came from and what is in it: how many markers, how many of them are scenes, and how many arrived with a recipe already named.
10.3 Reviewing on the timeline#
The Trace overlay draws what the read found over the timeline, so you can judge it rather than trust it blind. A single detection curve runs across it — the energy the read worked from, scaled so its loudest peak reaches the top and every marker sits exactly on the peak you can see. Seeing it tells you why a moment was marked.
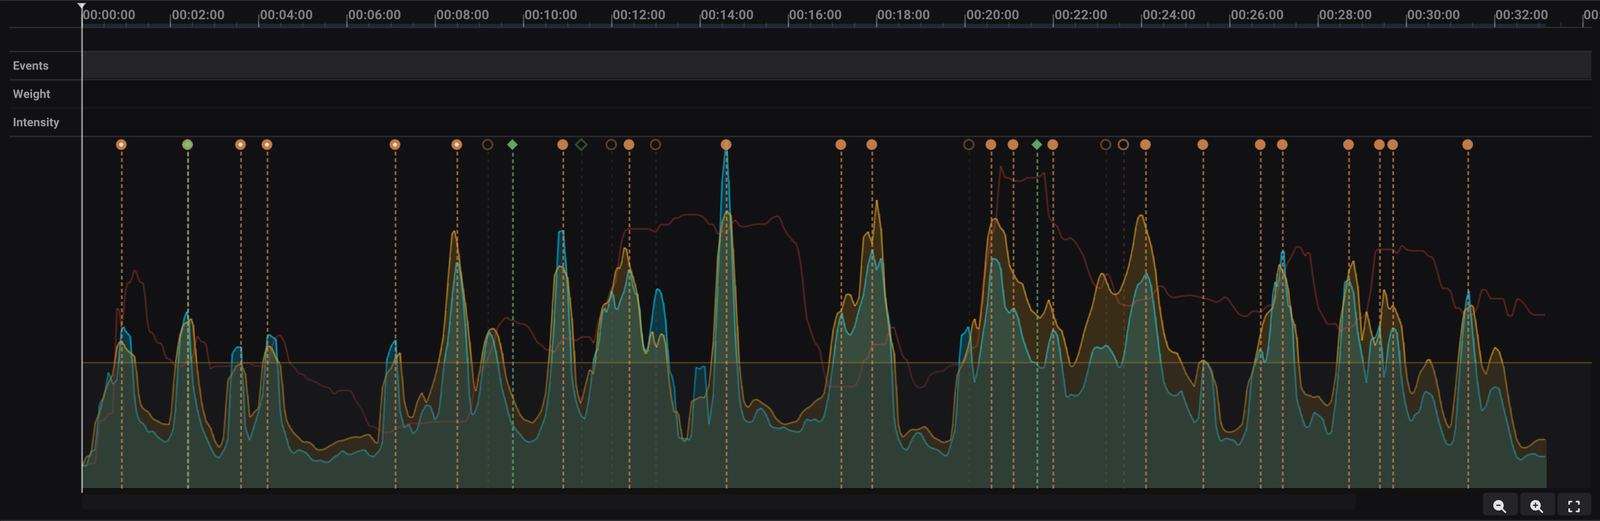
Across the curve sits one horizontal line, the waterline. Drag it anywhere; it does not snap. It divides the read in two, and the handle at its right end — an arrow and a live count — decides which half you keep: the peaks above the line, or the quieter region below it. Click the handle to flip. The side you are keeping is drawn bright and the other dimmed, and the count updates as you drag, so you can set how busy the import will be before committing to it.
Keeping the peaks gives you the hits. Keeping the region below gives you the subtler moments a hit-led read steps over.
Select a marker’s body to move the playhead there and check it against picture. Lasso a group to work on several at once — and you can build a selection of separate, non-adjacent markers as well.
The two cards at the top of the tab, Picture and Markers, hold one source each. When both of them hold something, clicking a card’s label hides that source and clicking it again brings it back — useful when you want to work on one at a time. A dimmed label means a source is not contributing, whether because it is empty or because you have hidden it. The X in a card’s corner clears that source altogether, along with its selection.
Below the cards is the count of what you have — split into picture and markers when both are in play. It follows the waterline and any source you have hidden, so it is always the number of moments actually in front of you.
10.4 Choosing what they sound like#
Read moments and imported markers arrive blank — they mark where, not what. The recipe picker at the bottom of the tab, Apply a recipe…, sets what all of them become, so every moment you import becomes a fully specified event of that kind rather than an empty marker. The choice takes effect at once: the weight of every accepted moment updates on the timeline as you pick, so you see what you are about to import before you import it. The play button beside the picker previews a recipe where one has been baked for it, and (none) at the top of the list clears the choice again, with its keywords, its library filter and its bus. Any individual marker can be given a different recipe from its context menu, so a run of impacts can share one recipe while a few special moments get their own. (Markers imported from Pro Tools that already carry a recipe in their name keep it; see 10.2.)
10.5 Importing as events#
When you are happy, select Import Events at the bottom of the tab — the button carries the count it will bring in, falling and rising as you reject and accept. The accepted moments become events on the timeline, ready to build like any other, and you carry on in the Events tab.
They arrive filed. Picture events go into a folder of their own — Picture: Import 1, and a new one for each read you import after it — and markers into a folder named after the session they came from. Scene markers become scenes (4.7). If a work area is set, only what falls inside it is imported, so you can bring in a reel a section at a time. The moments keep their selection afterwards, so a second pass over them is one click away.
10.6 Picture Conform — a new cut of the picture#
Picture changes. When editorial sends a new version, drop it on the project — or choose File → Import Video… — and the project follows it. This is Picture Conform. Nothing to set up and nothing to confirm: the new picture is read, matched shot by shot against the one you had, and every event moves to where its picture went, with its layers. Scenes and the work area move too: a scene follows its own picture, and a scene the new cut splits apart becomes two (the second named Hall (2) and so on), both flagged so you look at them. A scene’s background — the Fill or Bed linked to it — is laid again over the new picture from the sound it already had, nothing re-rolled: its own stretch stays under its own shots, removed picture is spliced out with a crossfade, and over new picture the sound carries on. A scene before or after the picture moves with the picture nearest it, whole. The new picture takes the old one’s place at the same position on the timeline. It is one step: Cmd+Z puts the old picture and every event back. A copy of the project as it was is also kept in its Backups folder.
Only the picture is needed — no EDL, no change list. A new grade, a different codec or size, a letterbox, burn-in timecode or a watermark don’t get in the way. The current picture is read once in the background as soon as it is in the project, so usually only the new one has to be read when it arrives; that takes a fraction of the reel’s running time. The activity icon shows the progress; Esc (or Stop in the activity list) stops it, and nothing changes.
Timecode. When both files carry their own start timecode, the new picture is placed by it: if editorial took a leader out or put one in, the picture moves on the timeline by just that much, so the timeline’s timecode stays the picture’s and what you hand to Pro Tools lands on its picture. The activity list says when it did this. A jump of more than a quarter of an hour is a re-striped reel, not a leader; then the picture stays where the old one was.
EDLs. If editorial sends an EDL with each cut, drop it with the picture — both files at once — or leave it beside the video with the same name (Reel3_v5.mov and Reel3_v5.edl) and it is found on its own. An EDL dropped on its own is kept with the current picture for the next update. The picture still decides; the EDL confirms it. Where the two agree, the timing is certain — the still shots the picture alone can’t pin stop being flagged. Where the EDL names another clip in a shot’s place (another take, a VFX version), the shot is marked as replaced. Where a clear picture match and the EDL disagree, the picture’s place is kept and the event is flagged the EDL says otherwise. An EDL is lined up with its file by the file’s timecode, or by its own edits when the file has none or the sequence had a leader the file doesn’t; one that doesn’t line up with the picture is not used, and the activity list says so. CMX3600 EDLs from Avid, Premiere, Resolve and the like are read, drop-frame included; motion effects (M2) and black are left to the picture.
Avid change lists. A change list from Media Composer’s List Tool or FilmScribe — the text version, Columnar or Tabbed — does the same work as a pair of EDLs: it lists the steps that turn the old cut into the new one. Drop it with the new picture, drop it first and the picture after, or leave it beside the new video with the same name (Reel3_v5.txt). It is lined up and checked against the picture exactly as EDLs are, and the activity list says confirmed by the change list. A change list doesn’t say what an inserted shot is, so inserts are left to the picture. If both EDLs and a change list come with an update, the EDLs are used.
Every event ends up in one of three states:
- Moved. Its picture is there, and it sits on exactly the same frame of it as before.
- Moved, to check. Its sync marker turns yellow, and the reason shows on hover: it runs across an edit that changed; its shot was replaced (a VFX update, or another take — the picture can’t tell which); the action may differ; it sits in a still shot whose position can’t be pinned from the picture alone; or its picture appears twice in the new cut. Editing or moving the event clears the mark, and so does Mark OK in its right-click menu (for every selected event at once).
- Removed. Its picture is no longer in the cut. It is never deleted: it goes after the end of the picture, keeping its spacing, under a scene named after the old timecode it came from — Removed 01:02:03:04 – 01:02:10:00. Drag back what you still want.
Fit to Cut. An event that runs across an edit that changed — a long Contour over two shots when one of them was trimmed — keeps its shape and is flagged. Right-click it and choose Fit to Cut (it works on every selected event at once): it is cut at the changed edits, and each piece, with its own stretch of the sound, goes where its picture went. Pieces that land side by side stay one event; pieces that land apart become events of their own; what fell in removed picture goes. The cut edges get short fades. Nothing is rebuilt — every piece sounds exactly as it did over its picture. A free-standing Fill, Bed, Scatter or Alloy makes its sound to its length, so Fit to Cut rebuilds it to the new cut instead. (A scene’s background never needs Fit to Cut: it follows its scene by itself, as above.) One Cmd+Z undoes it.
The ruler shows what changed: red where the picture is new and has no sound yet, yellow where something wants a look, and a small mark where picture was taken out (hover for the old timecode). Its row in the activity list sums it up — Picture updated – 14 changes, 2:40 new, 9 to check, 5 removed — with Previous and Next to step through the changes and the events to check (Shift+Up and Shift+Down do the same), and Undo. The project remembers its last updates: reopen it and the ruler shows them again for that picture.
If the new file isn’t a new version of this picture at all — another film, or another reel — it simply replaces the picture and nothing moves; the activity list says so. A different frame rate is refused, with both rates shown. If the current picture’s file can’t be found, the cut can’t be matched and nothing changes.
11. The Events Tab#
The Events tab is where you specify and manage events. The left panel is the Event Inspector; the right panel is the Event List. What the inspector shows depends on how many events are selected, and on their shape.
11.1 Editing one event#
With a single event selected, the inspector shows its full controls. The exact set depends on the shape, but the common elements are these.
Top row. The shape icon doubles as a mute toggle (or press M). A lock toggle protects the event from rebuilding, and a rebuild button rebuilds just this one. (For your own placed files — Clip events — the lock is always on and there is no rebuild, because there is nothing to retrieve.)
Priority. Beside them sits the Hero toggle. A Hero is an event that has to come through — the hit the moment turns on — and marking one changes three things. It is allowed a little more density, because it carries the moment (8.4). Deconfliction protects it: it keeps its place in the timing pass and takes the lead in the spectrum, while the material around it makes room (8.8). And at delivery it is among the last things to be folded, with Hero layers never folded into supporting ones (14.8). It works by contrast, so mark few.
Keywords. Type words to include, with support for exclude terms, to steer which sounds qualify. The field autocompletes from your library’s keywords.
Library filter. Shows which palette the event draws from, or No libraries assigned. Select it to clear the filter and draw from everything.
Curves. The Weight curve (with its five bands and frequency labels) and the Intensity curve. Drag a curve vertically to offset it; double-click to reset. To paint a curve in full, use draw mode (the pencil, or D), which zooms the timeline to the event. A Spot’s weight is fixed; a Fill’s intensity is always drawn. The ⋯ in the Weight curve’s corner is the curve’s menu. Bypass Weight curve, switched on, takes the curve out of the casting: the event then draws on your whole library by its keywords alone, and the curve stays exactly as you drew it, dimmed and locked against drawing, ready to switch back on. On a Contour the same menu holds Trace from Sound… (11.12).
Shape. The Intensity curve’s corner shows the event’s family (4.2) as chips — Spot, Bloom, Contour for a figure, Fill, Bed for a ground — in the same place and style as a Scatter’s Arc, Flat and Drawn. Select one to switch the event in place; it keeps its place and its length.
The shapes stay distinct. Each remembers its own version of the event — its curves, its files and the sound it built — so switching back to a shape gives you exactly what it was, nothing inherited from the other and nothing re-rolled. Switching never builds: a shape the event has not been yet starts fresh and unbuilt, like a new event — a Bloom with its arc, a Contour ready to draw, a Spot as a Spot, a Fill ready to cast, a Bed empty for the files you choose — and is cast when you press Build. So you can switch back and forth freely and only build the one you keep. Two things a family always shares: a figure’s Weight — Spot, Bloom and Contour sit at the same Weight and move together, except that a hand-drawn Weight stays with Bloom and Contour (a Spot’s Weight is a single value) — and a ground’s Intensity, one curve for Fill and Bed. If the shared curve or the event’s length has moved since you last used a shape, its old sound no longer fits: it waits, unbuilt, for Build. Every switch is one undo step.
Sync point. On events with a body, a draggable marker on the intensity curve sets the moment the sound lands against.
Tools. A column of controls to the right: save or apply a recipe; set the library filter; pitch-tune to scale — follow the project, or force it off (not on a Clip); enter draw mode; and, for Fills, trace the picture — which reads the picture’s intensity over the Fill’s span and writes it into the event’s Intensity curve, aligned in sync so the bed lifts and settles with the image — link to a scene, and set the number of spectral layers.
Mix row. Event volume in dB, and pitch variation in semitones (0 turns it off). Every event has a bus, and every shape has a bus it lands on by default — its home, set in the Project tab (15.1). Out of the box a Spot, Scatter or Clip goes to FX A, a Bloom or Contour to FX B, and a Fill or Bed to FX C. Nothing is locked: any shape can go to any bus, and you can override the home here per event or across a selection. The Panner button sits beside the bus and opens the view where you pan a sound by hand (11.6).
For a Clip event — your own placed file — the inspector shows the file’s name, duration, sample rate, channels and bit depth, and under them its source: the whole file, with the Clip drawn on it as on the timeline and the rest of the file faint around it — the handles you can trim back into.
- Trim by dragging an edge; slip by dragging inside — the Clip stays where it is on the timeline, and the part of the recording it plays moves.
- Fade as on the timeline: a short one from the top corner, a longer one along its line.
- Sync point — drag it anywhere in the Clip to choose which moment of the file lands on your sync mark, frame by frame. The hit stays on its mark and the audio moves around it.
- Zoom with the wheel or trackpad and pan with a sideways scroll or the scroll bar; a double-click shows the whole file, or frames the Clip again.
Below the source is the text the file itself carries — its description and embedded tags, nothing guessed — and a replace file control. You can also trim and fade a Clip directly on the timeline: drag near an edge to trim, the top of an edge to fade.
Along the bottom, a Clip has volume, pitch and Reverse:
- Pitch is varispeed, as on tape: up is higher and shorter, down lower and longer, in semitones, up to two octaves either way. You hear it as you drag, even while the Clip plays, and its fades shorten or lengthen with it.
- Reverse plays the Clip backwards and turns its fades round with it, so a short fade-in and a long fade-out become a long swell and a short end. The source view runs the other way too, so it still reads left to right.
Both keep the hit on its mark: the moment at the sync point stays where it is, and the Clip’s start and length move around it. Neither interrupts playback, and both are heard everywhere the Clip goes — playback, bounces, every export. In an AAF a pitched or reversed Clip keeps its handles: pull a reversed Clip’s head out in your DAW and the reversed sound simply begins earlier.
11.2 Editing several events at once#
With more than one event selected, the inspector shows the controls that can be set across all of them: mute, lock, and rebuild for the selection; a keywords field that applies to all; a recipe to apply to all; and a mix row for shared volume, pitch variation, and bus, with the number of selected events shown above them.
The Panner works across a selection too: select any number of events, open it, and one drag moves them all (11.6).
11.3 The Event List#
The right panel lists every event in the project, grouped and ordered, with the project’s event count in its header.
Scene controls. At the top, a scene selector filters the list to a scene or shows all, with controls to create a scene from the work area, rename, delete, and open the Set Background… chooser for the active scene (see 11.8).
Groups. Events can be collected into groups, shown with a collapse triangle, a name and count, and a chain-link toggle. A linked group selects and moves as a unit; an unlinked one holds the same events as independent. A group’s menu lets you save it as a Chain, rename, ungroup, or delete it. Drag events onto a group header to move them in.
Event rows. Each row shows the event’s lock state, shape, name, timecode, and small weight swatches indicating its spectral balance. Muted events are dimmed and marked. Select a row to select the event (with Shift and Cmd modifiers as elsewhere); select a sole-selected row again to expand it.
Layer rows. Expanding a built event reveals its layers — the individual sounds that were combined to build it. Each gets a row of small controls, described in the section below (11.4).
11.4 Layer controls — auditioning and steering a build#
Expand a built event and each layer gets a compact row of controls — where you take a build from what came back to what you want, without leaving the timeline and without rebuilding anything.
The controls, in the order you tend to reach for them:
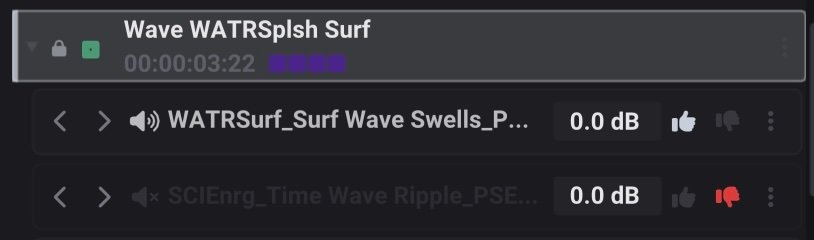
Previous / Next — step through the alternatives. Every layer was the top-scoring candidate for its slot, and the ranking behind it is still there. The arrows step through it, swapping the layer in place while everything else stays put — so you keep the layers you like and walk one through its alternatives rather than re-rolling the whole event. Where pitch variation is on, each candidate arrives with its own pitch rather than inheriting the last one’s.
Audition. Select a layer’s name to solo it; select again to stop. A layer that was pitch-shifted to fit shows its shift.
Volume. A layer’s level against the others — balance inside the event, before any bus-level mixing.
Like / Ban — pin and ban. Like pins a sound: a fixed choice that survives every future re-roll and rebuild of that event (Unlike lets it go). Ban bans it from the entire project — you will not hear that file again on this job, in any event, on any re-roll. Between them, each re-roll draws from a pool closer to what you want.
The … menu. The last control on the row opens a small menu: Show in Finder (Explorer on Windows). Delivery folding and channel layout are left to Sonic Alchemist — the fit decides at delivery (14.8), and a palette’s own Channel layout (12.1) covers its files. A layer that carries an older per-layer setting shows one line to put it back to automatic.
11.5 Pitch on an event#
Pitch variation lives on the event itself; scale quantisation is a project-wide setting that an event can opt out of or force (see 15.6).
Pitch variation spreads the event’s layers across a random pitch range, set from the mix row in semitones. At zero it is off and every layer plays at its natural pitch. As you raise it, layers are shifted independently within the range you set, up to two octaves either way. It also widens the search slightly, so the engine looks across a little more of the spectrum when choosing.
Pitch changes are varispeed, and an event’s sync point is preserved through the shift — a pitched-down hit still lands on its frame.
11.6 The Panner — panning an event by hand#
An event you have not touched sits on the centre speaker, C, and plays as it is (8.12). To move it, select the Panner button on the inspector’s bottom row, beside the bus, or press P. Escape leaves. The button’s face shows where the event sits.
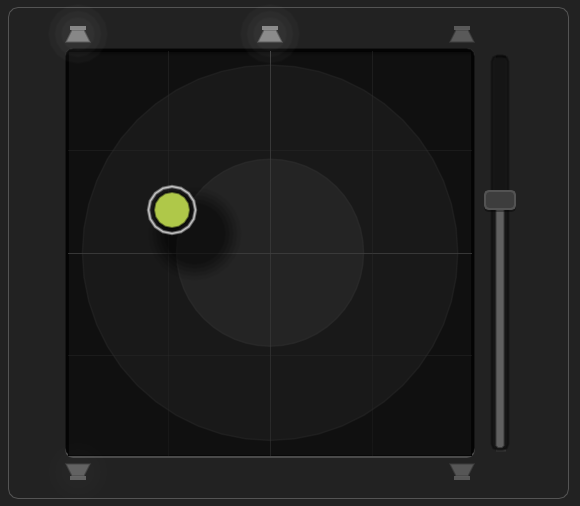
The Panner is the room seen from above, front at the top. Drag the dot to pan the sound, and you hear it move as you drag. The five speakers stand where they are drawn — L, C and R across the top, the surrounds in the back corners — and a dot on a speaker plays from that speaker alone. Selecting a speaker snaps the dot onto it. Distance from the middle is divergence: on the edge the sound comes from that direction, and toward the middle it opens to every speaker, all around you at the centre. In a stereo mix only left and right count, as a stereo track’s pan. A stereo sound moves as a linked pair at its full width — on C, its left on L and its right on R.
The slider at the right edge is height, from ear level to overhead. It is independent of the dot, so a sound can be centred and above you at once. On a layout without height speakers it folds to the floor.
Right-click the dot to return it to C. Right-click the Panner button to Copy Pan from the event and Paste Pan onto a selection.
A multichannel layer — 5.1, 7.1 — is never panned: it plays by role, as recorded, on the monitor and in every export, as surround beds do in any DAW. Where you put a sound is saved with the project, and is not carried in a recipe.
11.7 EQ — shaping an event, never its files#
Every event has its own EQ: a low cut, a high cut and two bells. Select the EQ button on the inspector’s bottom row, beside the Panner, or press Q. Escape leaves. Its face is a miniature of the event’s curve, lit when the event has EQ.
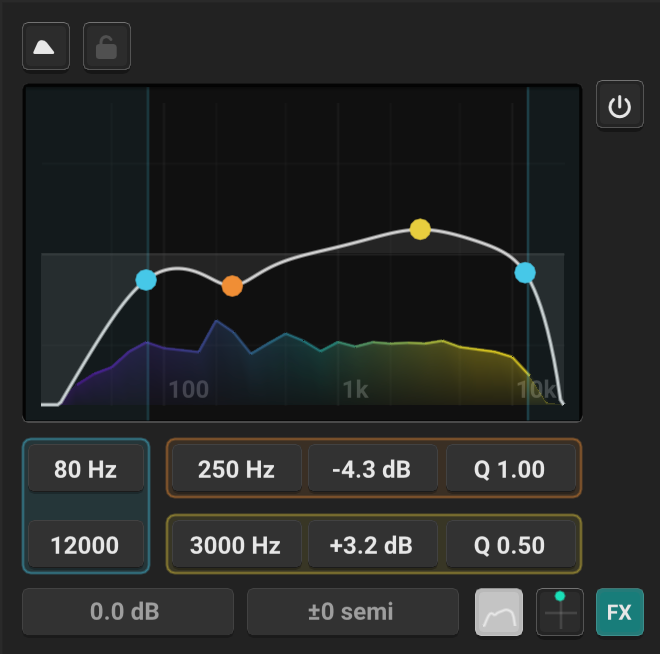
It is non-destructive in the way a clip EQ in your DAW is: your files are never touched. The EQ belongs to the event, not to whichever sound fills it, so it survives a re-roll, a recast and a new cut of the picture, and it plays on every layer of the event — an event is one sound.
The EQ replaces the keywords and curves, as the Panner does: frequency across, 20 Hz to 20 kHz, gain up and down, ±18 dB. Behind the curve the event’s own spectrum runs as it plays, after its EQ, so you see what you are cutting.
- Cuts. Drag the curve’s left end in for a low cut, its right end for a high cut — 12 dB per octave, with no ringing. A cut can be taken anywhere along its edge. At the end of its travel it is off. Either cut reaches across the whole range, so a high cut at 300 Hz puts a sound behind a wall; the two never cross.
- Bells. Both bells are always there, flat at 0 dB until you move them, at 250 Hz and 3 kHz. Click anywhere in the view to bring the nearer flat bell there. Drag a bell for its frequency and gain; scroll on it to change its width (Q), or hold Option (Alt) and drag up or down for the width alone, as in Pro Tools.
- Double-click a handle to turn a cut off or set a bell flat. It stays where it is.
- The values sit under the view, a band to a row — the low cut and the first bell, then the high cut and the second — and each can be typed.
- A handle is filled while its band is at work: a cut that is on, a bell that is not flat. Point at a handle or at its values and both light together, so you always see which is which.
You hear every move as you make it. A change glides to its new setting rather than jumping, so a drag sweeps the filter without a click, during playback too. Bypass — the first button of the tool column — compares with and without, your settings kept.
With several events selected, the view shows each event’s curve and edits one band at a time: drag the low cut and every selected event takes that low cut, its bells untouched. Right-click the EQ button to Copy EQ from the event and Paste EQ onto a selection.
The EQ is saved with the project and undone a gesture at a time. Like a pan position, it is not carried in a recipe.
In an export, every WAV is a print of what you hear, EQ included (14.2). A session — AAF, REAPER or Pro Tools — carries it while the export’s EQ option is on (14.1): an AAF or a REAPER project with the EQ rendered into the clip media, a Pro Tools session as each clip’s own Clip EQ on clean media, set to sound the same, so the mixer can still change it or switch it off. Turn EQ off to hand the files over pure and untouched. Ranges are in 19.1.
11.8 Scenes and backgrounds#
A Scene is a marked region of the timeline, and its purpose is backgrounds. A Fill or Bed linked to a Scene takes its length from the Scene: move or resize the Scene and the background re-lengthens to fit, with the crossfades where one scene meets the next redone for you.
Marking a Scene. Arm the Scenes lane with the clapperboard control in its header and drag across the span, or set a work area and press S (see 9.3). Name it as you go; scenes that share a name share a colour.
Setting a background. Right-click a Scene and choose Set Background… (the chooser also opens on its own the moment you finish naming a new scene). A small panel appears under the scene’s name, listing any backgrounds it already carries and offering, from the top:
- Empty Fill — a blank Fill you then specify from your library, exactly like any other Fill: keywords, Weight, an Intensity curve, and a layer count, assembled from your own material.
- Empty Bed — a blank Bed you fill with your own chosen files by dropping them onto the scene (see 11.9).
- your saved Fill and Bed recipes, if you have any — a one-click way to drop a background you have already dialled in.
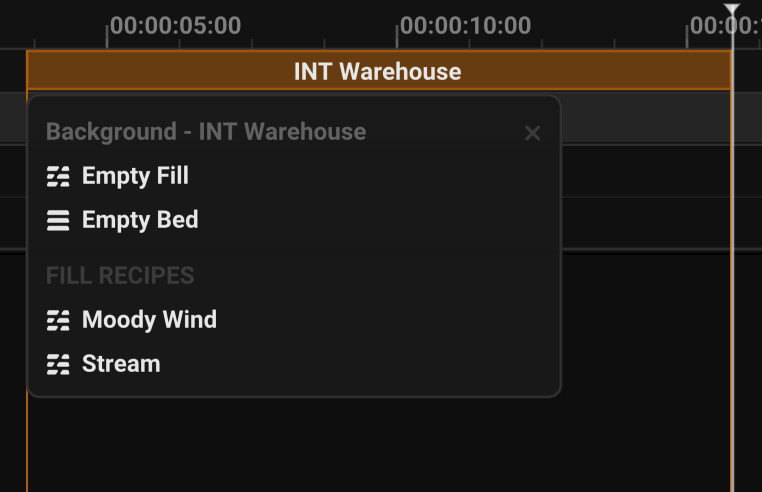
A Scene can carry more than one background at once — a searched Fill and a file-based Bed layered together, say — and each appears in the panel with a × to remove it. Close the panel with its × or Esc.
Adjusting a background. A background is an ordinary event — a Fill or a Bed — that happens to be linked to the Scene, so you adjust it by selecting it and editing it in the Event Inspector, just like any event. A Fill background shows the usual Fill controls — keywords, Weight, its Intensity curve, and a layer count; a Bed background shows its file list instead (see 11.9). Whichever it is, its length stays tied to the Scene: resize the Scene and the background follows.
Across a whole timeline. Mark out the Scenes and give each its own background, and the film has a continuous bed — each section with its own character, the joins crossfaded, pinned to picture. When the cut changes, the backgrounds follow it (10.6).
11.9 The Bed inspector#
A Bed is the one background built from files rather than a search, and its inspector is a card list, one card per file. Drag the cards to reorder; each card’s ⋯ menu offers Loop, Replace, Remove, and Show in Finder, and an Add file button or a drop onto the inspector brings in more. Loop decides whether a file repeats to fill the scene or plays once, so seamless loops and one-shots can share a bed. Auditioning, volume, and mute live in the layer rows (11.4), as with any event.
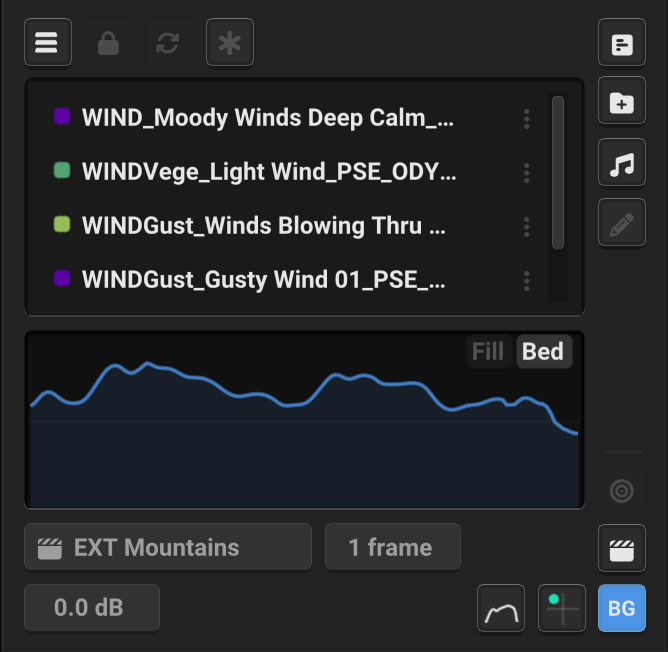
Instant to move. A Bed sounds a moment after you place it, and from then on moving it, moving its scene or trimming it costs nothing — it plays the same sound, cut where you put it. Lengthen it and the new part carries on from where it ended; what you have already heard never changes. Only adding a file or turning Loop on makes it again. Beds play from disk, so a long one, or a file used in a dozen scenes, takes almost no memory.
A Bed’s Intensity curve is volume rather than density — draw it up to bring the bed forward, down to tuck it under, to the floor for silence. It is the one place Intensity sets level directly, since a bed’s density is simply the files you put in it.
To place a Bed at the playhead, select Bed beside Fill in the transport bar (5.5). To make one by dragging, ⌥-drag audio onto the timeline (Alt-drag on Windows); a plain drop makes ordinary Clips instead.
11.10 Bounce to Clip, and Unbounce#
When a combination is right and you no longer want to re-roll it, you can commit it. Select the events, choose Bounce to Clip, and they build down to a single file that drops back in their place as one Clip — an intent you have shaped becomes fixed material. The intent shapes get you to the sound; the bounce fixes it.
Bouncing. Select one or more events — a single event, a stack across tracks, overlapping hits, whatever the moment is — and choose Bounce to Clip from the right-click menu or from Composition → Bounce Selection to Clip. The selection is replaced by one Clip at the same position, locked, playing the bounced file. Muted events in the selection are left out of the bounce and left where they are, so you can hold a layer back without deleting it. The whole thing is a single undo: if it is not what you wanted, one Undo brings the events back untouched.
The bounce is dry — no reverb is baked in, because the Clip re-enters the same mix and would otherwise be reverberated twice. What is baked in is everything belonging to the events themselves: their levels, fades, intensity and deconfliction shaping, and pitch. You treat the result like any other Clip — trim it, fade it, move it. Bounced files are gathered into the project’s Audio folder on the next save, alongside every other source it uses (see 17.1), so a bounce travels with the project like anything else.
Unbounce. A bounce is not a dead end, and neither is anything else this application writes. Opening a printed sound back up into what made it is what we call Unbounce. Right-click a Clip and there are two ways back.
Unbounce to Source gives you the layers that are actually in the file. Each one arrives as a Clip pinned to its own source, at the exact region, gain and fades it had when the file was written — not a fresh interpretation, but the thing itself, opened up. This is what you want when a sound is right and you need to re-balance it, replace one component of it, or take a single layer somewhere else.
Unbounce to Recipe goes back to the specification instead and builds it again, so the generative parts re-roll and you get a new reading of the same idea — another take of the same intent.
Either way the events arrive positioned relative to wherever the Clip now sits, so if you moved it after bouncing they land where the Clip is rather than where they started.
This survives leaving the application — and the two ways back survive differently.
Unbounce to Recipe travels anywhere. The specification rides inside the file, so a delivered sound dropped into Sonic Alchemist on any machine rebuilds its layers from that machine’s library — no original files and no records needed.
Unbounce to Source is the deeper one, and it depends on what happened to the file. Recovering the exact layers needs both the original sources and the record of that particular render. That record is kept inside the file itself and on the machine that made it — and, if you turn on Source record in delivery folder (16.1), in a small .saprints.json file in the export’s folder, so a delivery carries its own records with it and a machine that has never seen the project learns them the first time it touches the file (17.4). The file names its sources by file name only, never by the folder they live in; they are found again by their audio content (17.4). A file that has been copied, renamed, imported and moved through several hands still carries everything it needs. A file that has been processed or re-written by another program has lost its own copy — and then it is the record that finds it again, by the file’s name, its stamp, or its audio content.
What survives what:
| What happened to the file | Unbounce to Recipe | Unbounce to Source |
|---|---|---|
| copied, moved, renamed | yes | yes |
| imported and placed in any DAW | yes | yes |
| processed, consolidated or bounced in another program | yes, if the name is kept | yes, if the name is kept — anywhere the delivery folder (or the exporting machine) is |
| its metadata rewritten by another tool | yes | yes — the record matches the audio itself |
| trimmed, converted, or re-recorded | not reliably | needs the name or the stamp |
Where a source has moved or gone, what can be recovered is laid down and the rest goes through the usual relink (12.6), which names the files you need to find.
Both items are always on the menu. When a file cannot support one of them it is greyed out and says why, so the menu tells you what a file still carries rather than quietly offering less.
Two habits make the difference, and they are worth passing to an assistant: keep the filenames that come out of an export, and keep the exported audio rather than re-rendering it elsewhere. Follow those and a sound stays openable. This is a safety net built with care, not a guarantee against everything the world can do to a file.
So you can bounce freely to keep a busy timeline light, deliver freely, and open up again only the one combination you decide to revisit — whenever that turns out to be.
11.11 Alloy — three drawers and a shape#
An Alloy builds one sound from four in your library, the way you would layer it by hand. Three drawers — Low, Mid and High — are each heard only in their own band, and a fourth sound, the Shape, gives the result its movement: its attack, its decay, its swells. The Shape is never heard itself. Each drawer plays in its band at its own level, nothing evened out, so a heavy sound in the High drawer still lends its top end. Each drawer lends its colour, not its own hits or rhythm; the Shape’s movement rides the whole sum, the same in every band, and that is what fuses three sounds into one. On a Bloom or a Contour the Intensity curve leads: the Shape lends only the texture of its movement — its flutter, its grain, its small attacks — with its own rise and fall taken out, and your Intensity draws the gesture in full, from silence to the top; on a Spot the Shape is the hit and keeps its whole movement. The Weight curve is followed over time: where it rises the High drawer comes up and the Low goes down, where it falls the other way, so a Contour drawn bright in places is bright there. The drawers are cast across the curve — Low from its darkest stretch, High from its brightest — and the bands meet where the curve lives: lower for a dark curve, higher for a bright one. Every build rolls a new alloy.
Turn it on with the Alloy button at the end of the Inspector’s top row, or right-click any Spot, Bloom or Contour and choose Alloy — for several events at once, too. A built event becomes an Alloy of the sounds it already has — nothing is re-rolled: the loudest layer is the Shape, so its timing and movement carry over, and the layers become the drawers by where they sit, darkest LOW to brightest HIGH, each from exactly the part it was playing. With only two layers, the louder one is both the Shape and the middle drawer; with one, it is the Shape and the middle drawer, and the low and high drawers are cast for it. Only an event not yet built has all its drawers cast around the Weight. Level over time is still the Intensity curve, as for every event.
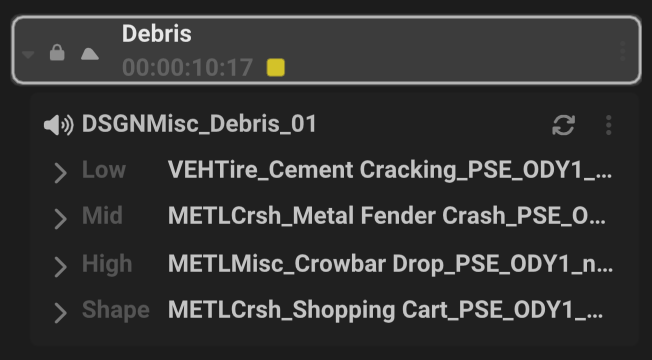
In the layer list an Alloy shows its four sounds by name, each with its band in the tooltip. Click a drawer’s name to hear that drawer alone — through its band and under the Shape, as it plays in the alloy; click the Shape’s to hear the shape sound itself, and click again to stop. The arrow beside a drawer tries another sound for that drawer only; beside the Shape, another shape. The swap button on the Alloy’s own row moves all four round — Low to Mid to High to Shape and back — so every click is a different sound and a different movement. (An Alloy’s row has no gain field: its level is the event’s, in the Inspector.) Nothing is re-rolled: the same four sounds, each meeting another band. Turn Alloy off to go back to the layers the event had before — the same sounds, as they were, moved with the event if you moved it; turn it on again and it is the same alloy. Neither way re-rolls anything: a new alloy comes only from Rebuild, or from unlocking the event and building. (Once the event’s length has changed, its old layers no longer fit, and Alloy off builds layers anew.) Exports carry the alloy as one clip, and its recipe names all four sounds — file names and fingerprints only, like everything else that leaves your machine.
11.12 Trace from Sound — the shape of a sound, made of yours#
Any sound can give a Contour its structure — the shape that is its curves. A guide vocal, a temp effect, a creature, a recording of yourself: the Contour takes the sound’s length (the silence at its ends trimmed away), its sync point (the sound’s main attack) and both its curves, then is built from your library — the reference’s gesture, rhythm and colour, never the reference itself.
Three ways in:
- A Clip on the timeline — right-click it, Trace into New Event: a Contour at the Clip’s exact place and length (trim the Clip first to trace just the part you like). The Clip stays, muted, so you can compare the two.
- Material — the ◎ button beside ← and ↓: a new Contour from the highlighted sound — or just the part selected on its strip — with its attack on the playhead.
- A Contour you already have — ⋯ in its Weight curve’s corner, Trace from Sound…, and pick the file. The Contour keeps its sync time; the sound’s attack lands on it.
The Intensity is the sound’s loudness, scaled to its own peak — the loudest moment always at the top of the lane however quietly the file was recorded, 40 dB below it at the bottom — and the Weight is its brightness moment by moment, measured exactly as the library measures every file, so the sounds cast for a moment are the ones your library itself finds alike there. In quiet moments the Weight holds steady rather than chasing the noise. Save the traced Contour as a recipe, and the shape is yours to use with any keywords. One Undo takes a trace back.
11.13 Scatter — particles from your sounds#
A Scatter is a cloud of short sounds from your library, each one a particle with its own moment, force and place: rain, dust, rubble, gravel — anything that falls, bounces or breaks — or crickets, bees, crowds, crackle, traffic — anything that lives and calls. Place one with 5, or with Scatter in the transport bar.
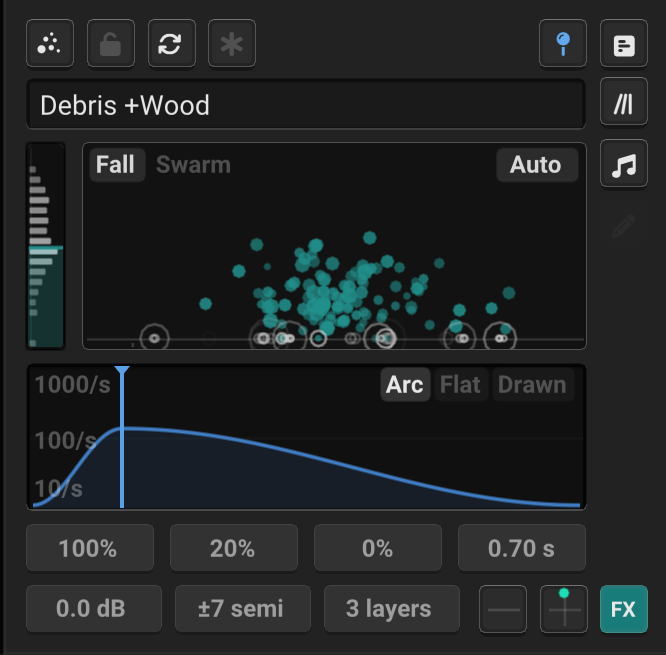
The stage. The top half of the inspector is the Scatter’s stage, and every flash on it is a hit you hear — at that moment, at that force, at that place across the field.
- While the transport moves — playing, or the playhead dragged — it shows exactly the moment under the playhead, frame by frame: just before the event, matter already on its way down; after it, the ring-out; past that, nothing, because nothing is heard. Hold the playhead and the picture holds.
- Stopped, hands off, it plays the event on a loop wherever the playhead is — each pass from an empty stage, the next beginning as the last one settles. Let go of the playhead inside the event and it plays on from there.
- Change anything while it plays and you see and hear it at once, in motion. It never starts over.
Fall or Swarm. The stage’s corner chooses the voice. Fall is things that land — particles falling, bouncing and breaking on a floor, each impact a hit. Swarm is things that live — creatures that each keep their own sound, pitch and place, and call again and again in their own rhythm, so a chorus phases against itself like a real one. Each voice keeps its own settings: switch to try the other and back, and each is as you left it.
Which sounds. The Weight lane at the stage’s left is the event’s Weight, as for any shape — sub at the bottom, air at the top, with your library’s coverage beside it. Drag its handle to choose the register; keywords and pins work exactly as anywhere else. It never changes the physics.
How many, and when. The bottom half is the Intensity lane, and for a Scatter it is density: nothing at the bottom, 100 a second at the middle, 1000 at the top, with the peak read on hover. Drag the curve up or down for more or fewer; a double-click puts its peak back at 100 a second. Choose its form in the lane’s corner:
- Arc — a bell on the sync point: the most land, or the chorus peaks, there. Drag the sync point onto the picture.
- Flat — steady, at 100 a second. Also the one click back to a flat line after drawing.
- Drawn — draw it with Alt in the lane, or on the timeline with the pencil.
Density is per second at full Intensity, so an Arc averages about half of it across the event. A Swarm’s creatures follow the curve too: none where it is at nothing, all of them at its peak, coming in and fading out as it rises and falls — and the calls you hear are exactly the creatures you see.
| Control | Voice | What it does |
|---|---|---|
| Length | both | How long each particle is heard — a tick, a chirp, or a whole whoosh or pass-by. Pitched down, a hit plays less of its sound rather than ringing on. |
| Throw | Fall | 0, everything falls from above; 100, everything is thrown up from the ground. Either way each lands when the Intensity says. |
| Bounce | Fall | 0 lands dead. Higher rebounds, and dense matter hitting hard breaks into smaller, brighter pieces. |
| Float | Fall | 0 drops hard; 100 drifts down like dust or feathers. |
| Life | Swarm | 0, each sounds once — crackle, single pass-bys; 100, each calls on and on — a chorus. |
| Float | Swarm | 0 sits still, like crickets in the grass; 100 flies — wanders while it calls, so bees move about you and a pass-by crosses the field. |
| Speed | Swarm | How fast they travel: 0 a crawl, 50 about a cyclist’s pace, 100 a car passing. |
| Attack | both | In the stage’s other corner. Auto follows each sound’s own start — a drip stays sharp, a wave fades in. Sharp starts every sound at once: impacts, ticks, debris. Soft fades every sound in and out: surf, wind, traffic. |
| Pitch | both | Pitch variety per particle. With Tune to scale on, every particle lands on a note of the scale, so a cloud of tones plays as a chord. |
Each creature calls in its own time. For slow and sparse, use a low Speed, a low Intensity curve and a long Length. Ranges and defaults are in 19.1.
Distance and movement. Every particle is heard from where it is: far ones are quieter and darker than near ones, so a field of rain or a shower of debris has depth. In a sparse cloud every hit is heard on its own; as the cloud thickens it is heard as dense as its rate, and its loudness follows the curve. A creature that moves is heard moving — its pitch rising as it comes and falling as it goes, its level swelling as it passes, its top end closing with distance. For pass-bys, choose sounds recorded close and static: a recording that already passes by gets the motion twice.
In the room. In the Panner (11.6) a Scatter shows its cloud from above, live — every particle where it is heard, every hit a flash where it lands. Where you put the dot is the part of the room the cloud fills: in the middle, the whole room; on the middle of a wall, that half; on a corner speaker (L, R, Ls, Rs), that quarter; in between, in between. It is always a region, never one speaker. Untouched, the dot sits at C and the cloud fills the front evenly, L to R.
- In surround — 5.1, 7.1, 7.1.4 or AmbiX, on the monitor and in every export — each particle is panned to its own direction, wrapping all the way round you with the dot in the middle; what flies is heard above you in the height speakers, and what lands stays on the floor. A surround export renders each Scatter layer straight into the deliverable’s own layout, whatever you were monitoring in, and on a surround track of an AAF each speaker’s file holds its own particles, not a stereo pair spread out.
- In stereo each layer plays at its full width with the dot at C, and moving the dot left or right moves it as a pair, as for any event.
The surround image is made in the background as you work; until it is ready, the layer plays from where the Panner is.
Its sounds are its layers. A Scatter’s sounds sit in the layer list like any event’s (11.4) — one row each, auditioned, muted, levelled, liked or banned on its own, stepped to another sound with < >. One cloud runs over all of them, each hit going to the layer whose sound it plays, so they never stagger against each other, and they export as separate clips that sum to exactly what you heard.
- Layers, on the bottom row beside the pitch, is how many sounds: three to start, from 1 to 12. With pins it is exactly the pinned sounds — pinned from the layer list, the Library or the Material search, indexed or not. Fewer drops the last sounds you did not pin; more adds new ones beside the rest.
- The sounds share the cloud near evenly, leaning a little toward those nearest the Weight, and each is matched in loudness first, so a quietly recorded file is heard like the others.
- A long recording is used across its whole length, so no two particles play the same stretch of it.
Start, end and ring-out. A steady fall lands across the event from its first moment. Whatever is still bouncing or settling at the end rings out past it, up to five seconds, and Protect Silence never cuts it. Every hit has its own fades, so nothing clicks.
A new roll. An edit is heard a moment later with the same sounds and the same roll. Build and Rebuild roll a new cloud — every event its own, even copies built together — and every take of Export Variations (14.7) is a fresh roll of the same sounds.
Layering clouds. One Scatter is one kind of matter. Layer several — a long, light drift of dust under a short, heavy burst of rubble; a chorus of crickets under a few close ones — and save them as a chain (4.6). Workflow 7.2 walks through it.
12. The Library Tab#
The Library tab is where you tell Sonic Alchemist which of your sounds to draw from. It holds your palettes — indexed folders and saved selections — and shows their spectral coverage. The application ships with no sounds; this is where you supply them.
12.1 Adding sounds#
Select Add Folder and choose a folder, or drag a folder onto the panel. The folder is scanned into a palette — Sonic Alchemist reads each file once and stores what it needs to match against, so that selection later is instant. Large folders scan in the background; you can keep working, and the activity icon shows progress. Drag in individual files instead and they become a palette directly. A rescan is only needed when a folder’s contents change.
How long a scan takes is set by the drive rather than by the machine: reading the opening of every file in a large library means pulling tens or hundreds of gigabytes off the disk, so a healthy drive indexes in minutes what an ailing one takes hours over. If a scan is far slower than you expect, suspect the disk the sounds live on before anything else — the same library copied onto another disk is the quickest way to prove it.
What indexing reads from each file. For every file, the scan measures and stores: its spectral profile — where its energy sits across the spectrum; whether it is transient or sustained, and where its onset and peak fall in time; how tonal or noisy it is; its pitch, if it has a clear one; its duration, channels, and bit depth; and its keywords. None of this is guesswork you have to supply — it is read from the audio itself, which is why an unlabelled file is still fully usable: Weight, shape-fit, and character all come from measurement, and keywords only sharpen what is already there.
Where keywords come from. Keywords are drawn from each file’s name and folder path and from any embedded BWF description or WAV metadata (the description, title, and comment fields). They are filtered against a sound-effects vocabulary, so that meaningful terms — metal, impact, whoosh, debris — are kept and incidental ones dropped. The inspector’s keyword field autocompletes from this index as you type.
What the scan reads. Beyond the audio itself, indexing takes whatever a file already carries: the descriptions and keyword sets that Soundminer, Soundly and the library publishers write into their files — the BWF description and the iXML block — along with the standard title, comment, album and genre fields. Where a filename begins with a Universal Category System identifier, the scan expands it — the category, the subcategory, and the full set of synonyms the standard lists for it — so a file named WATRSplsh_… becomes findable by aqua, liquid, pour, stream and the rest, not only by the words that happen to be in its name. Where a library carries none of this, its own words are read from the filenames instead, so untagged and non-English collections stay meaningful. All of it feeds both matching and autocomplete. A Clip’s inspector shows what the file itself carries — its own description and tags, whether or not it came from an indexed palette — and not the terms the scan added, which are for finding sounds.
Channel layouts. The scan reads each file’s channel layout — mono, stereo, LCR, quad, 5.0, 5.1, 7.1, 7.1.2, 7.1.4, or ambisonic. Where a file carries an embedded channel map, that map is authoritative and used as it stands. Where it does not — and a great many library files do not — the layout is read from the channel count in the standard SMPTE/ITU order. Hover a layer row or a Bed card to see the layout the application settled on, and where it is wrong, set it yourself — as below.
Where detection cannot resolve a file — a four-channel file that might be quad or might be B-format, a poly WAV of eight discrete microphones that is not a 7.1 bed at all — set it yourself. Channel layout in a palette’s menu applies to everything in that palette; the same setting on a layer’s menu applies to that one file everywhere it is used and overrides the palette. It is a property of the file rather than of the event, so a source always reads the same way. Auto detects as above; Surround forces the file to be read as a speaker bed; Discrete (multi-mono) treats its channels as unrelated mono; and Ambisonic marks it as B-format, so that such a file is not mistaken for quad.
Ambisonic sources. A first-order B-format file — four channels in the standard ACN/SN3D layout — is read as the spatial field it holds rather than collapsed: it decodes to your speakers, to the headphone monitor, and into a surround export, and folds to a proper stereo image in stereo. Higher-order files are read from their W channel.
Multi-mono sets. A library that has passed through Pro Tools often arrives as multi-mono — Rain.L, Rain.R, Rain.C, Rain.LFE as separate files rather than one. Sonic Alchemist recognises these as a single source — one stereo or surround sound, as it was in the session. A build chooses it by its front channel and brings in the whole set as one layer: Room.L of a 5.1 set arrives as the 5.1 room, City.L and City.R as one stereo layer, the same stretch of every channel. Two channels of one set are never laid up as separate layers of an event, which would give you correlated, phase-thin material that sounds wrong for reasons that are hard to place; banning a set bans all of it. Detection is conservative: files must share a folder and base name, carry matching role suffixes, and agree on sample rate and length. Mid/side pairs and lone role-suffixed files are left alone. If a set is ever grouped by mistake, Treat as separate files in the palette menu turns it off.
In the Material search a set is one sound, as it was in the session: it appears once, under its name without the channel suffix, and you hear it in stereo or surround — each channel on its own speaker on a surround monitor, folded to two on a stereo one. Drop it on the timeline, make it a Bed layer or pin it to an event — or drag the set’s files straight from the Finder, onto the timeline, a scene or a Bed — and it arrives as one stereo or surround file, sample for sample the same as its channels, kept in Multichannel in your Sonic Alchemist folder (Documents).
12.2 Spectral coverage#
The left column shows five vertical bars — Sub, Low, Mid, High, Air — summarising the combined spectral coverage of your enabled palettes, with the file and palette count beneath. Where a band reads thin, events weighted into it draw on the nearest material instead. The summary follows as you enable and disable palettes.
12.3 Palette cards#
Each palette appears as a card with a checkbox (whether it is active in this project), its own small spectral signature, its file count, its name, its keywords, and — for a saved selection rather than a scanned folder — a Palette tag. The card’s menu lets you enable or disable it in the project, rename it, Rescan a folder (hold Option — Alt on Windows — for Rescan All Files, which analyses every file again rather than only new and changed ones), relink a folder that has moved, set its Channel layout or Treat as separate files (see 12.1), show it in the Finder (Explorer on Windows), or remove it.
12.4 Saving a palette#
After a build, Save Palette lets you keep a chosen set of sounds as a named palette of its own — a curated collection you can reuse and assign to events, rather than a whole folder. Choose the files to include and save.
12.5 Enabling palettes per project#
The checkboxes decide which palettes a project draws from. You might keep many palettes indexed but enable only a few for a given job — the whole set of sounds for a project, set in one place. Disabling a palette removes its files from every match without un-indexing it, so you can audition how a project sounds drawn from one collection versus another in a couple of clicks.
12.6 Missing sources#
Every file a project references is tracked by a stable content identity rather than by its path alone, so a file that has merely moved but is still present somewhere known heals on its own — the path updates quietly.
What genuinely cannot be found is gathered under Missing sources at the top of the Library tab, with a count badge on the tab. Each missing file offers Locate… (point at the file itself), Locate folder… (point at where it now lives, which often heals its neighbours in the same move), and Relink all (resolve everything findable in one pass).
A missing file never blocks a build. The layer degrades to a flagged silent gap — the event keeps its place, its timing, and everything else — and fills back in the moment the source is relinked. A missing video behaves the same way (17.2).
12.7 Preparing your library#
Sonic Alchemist is only ever as good as the sounds you point it at — it ships with none for exactly that reason. What it rewards:
- Coverage across the spectrum. Watch the coverage bars (12.2): a band that reads thin, sub especially, is where events will struggle.
- Words in names, paths and metadata. Keywords come from all three (12.1), so a library organised by folder (
Metal/Impacts,Wind/Gusts) steers well without retagging. Untagged files still match on Weight and character. - Palettes for recurring jobs. Save a set that works for a kind of scene (12.4) and enable just that for similar work.
- Multi-mono sets as they are.
.L/.R/.Cfiles from a Pro Tools session are recognised as one source (12.1); there is nothing to recombine first.
13. The Mixer Tab#
The Mixer is where you assign your material to busses, set their levels, and add reverb. It is a working monitor balance, not a final mix, and it is the structure your export inherits.
13.1 The busses#
The Mixer shows a strip for each of your busses, then Reference (when the picture has sound) and Master.
A bus is a group of tracks with a name, a colour, a target loudness and a place in the order. That is all it is. There are no fixed roles and nothing is reserved: a new project starts with three busses called FX A, FX B and FX C, and you are free to rename them, add more, or delete them down to one. How you organise is your decision, and you make it in the Project tab (15.1) — or rename a bus right here, by double-clicking its name on the strip.
The convention the defaults suggest is the common one — hard sync effects on the first, supporting material (sweeteners, designed layers, the sounds that thicken rather than sync) on the second, and backgrounds and beds on the third. It is a suggestion, not a rule. On a show with a real track layout you will more likely have busses called Impacts, Debris, Tires and Wind, and each shape sent to the one it belongs on.
- Reference — the picture’s own soundtrack, for reference while you work. The strip appears only while a video with audio is loaded, and it is never exported.
- Master — the output.
When you export, the busses become the track and stem layout you open in Pro Tools or Nuendo: a stem bounce writes one file per bus, and an AAF lays the tracks out by bus, named accordingly (FX A 1, FX C 2, and so on) in the order you set here. Whatever you sort here is what you continue editing there — your hard FX, support, and backgrounds arrive on separate, labelled tracks rather than collapsed into one pile. Each bus also carries a target loudness used for normalisation (see 15.4), so they sit at sensible relative levels before you have touched a fader.
Where a sound sits in the room is a separate question, and the order here does not affect it: that is each event’s Panner (13.3).
Each strip has a fader with a dB scale (0 dB at 80% of travel; double-click to reset), a dB readout, a VU meter with peak hold, and a mute. The bus strips also have a solo and a reverb send — the short purple bar below the fader: drag it, hover it for the amount, double-click for 20%. A strip that will not be heard — muted, or not soloed while another bus is — goes grey, its name and its fader, so what plays and what does not tell apart at a glance.
13.2 The reverb#
A single reverb is shared by every bus’s send. Toggle it with the power control.
It is an algorithmic reverb, and its whole range is on one control: drag the room view — the wireframe space that opens up in perspective as you push the far wall back — and the reverb morphs smoothly through five anchors, Booth, Room, Warehouse, Cathedral, and Sky. The control is continuous, so you land near an anchor rather than on it. When you land on something close, the six knobs — Size, Decay, Damp, Pre-Delay, Diffuse, and Mod — let you refine it by hand (vertical drag; double-click to reset).
Rather than printing reverb onto a sound, you can export the wet signal as its own stem (14.4): a fully wet reverb on an adjacent track, balanced against the dry with clip gain. The wet/dry balance stays open in your session, and whoever opens it next does not need your plugins to hear what you intended.
13.3 Panning#
There is no pan or spatial control in the Mixer. Each event plays where its Panner puts it (11.6), and an untouched one as it is — mono in the centre, stereo on left and right, multichannel by role — the version a re-recording mixer expects to start from. The monitor and every export share it. Panning never alters your material: a layer that lands in the surrounds is the file you gave it, at a different level, on a different channel.
14. The Export Tab#
Export writes files to disk and is the point where the work leaves Sonic Alchemist and re-enters your own session. You can export a session — a Pro Tools session, an AAF or a REAPER project — WAV bounces, or both at once; the export button names whichever combination you have chosen. If a work area is set, only that range is exported — one reel, say — and the Export header shows it in timecode. Press X to export the whole timeline again.
14.1 Session#
Turn on Session to export the clips as a session your DAW opens. Format chooses which: an AAF for Pro Tools, Nuendo, or any DAW that reads AAF, a REAPER project, or a Pro Tools session with its AAF (both below). The options that follow apply to all three. In an AAF the clips arrive placed to frame, laid out on tracks named by bus (FX A 1, FX C 2, and so on) in the order you set in the Project tab, with volume automation and fades in place. Where a bus declares tracks (15.2), those are the tracks the AAF carries — exactly the declared count and formats, named by the bus, with the work fitted to them (14.8). Options:
Handles — how the fades and edit points are delivered. With handles off, each clip is exported already trimmed with its fades baked into the audio: tidy, final, smaller. With handles on, the full source extends past each cut by the number of seconds you set, and the fades become real, editable AAF crossfades — so you can pull a head or tail out, slip a sound, or reshape a fade in your DAW exactly as if you had cut it there. Turn on Full source to carry the entire source file behind every clip instead of a fixed handle length.
Clip gain — writes the level work as Pro Tools clip gain: your Intensity shaping, any Fill curve, and the internal level-balancing between layers are combined into clip-gain automation, so the balance you approved travels with the clips and stays adjustable. With this off, clips arrive at unity and you set levels yourself.
Markers — carries the sync points across as memory-location markers, named with each event’s shape and keywords, snapped to the frame.
EQ — carries each event’s EQ (11.7) into the session: rendered into the clip media of an AAF or a REAPER project, or as Pro Tools Clip EQ on clean media. Off, the files go out pure and untouched. It turns on by itself the first time an event in the project has EQ; turn it off and it stays off.
Channels: Conform to layout / Keep source channels — the shape of the delivery itself, and the one control that decides whether your track declarations apply.
Conform to layout (default) delivers your declared tracks: layers are converted to each track’s channel format and folded together where the declaration asks for it. A surround layer on a declared surround track keeps its own channels, each on its own speaker — a quad or 5.0 on a 5.1 track plays from its four or five speakers, a 5.1 on a 7.1 track from the side surrounds. This is the mode that hands a mixer the track sheet they gave you.
Keep source channels is a pure passthrough: every layer arrives with its own channels, each on its own speaker, with nothing folded, mixed or panned. Each timeline track still arrives as one track. With Tracks: Multichannel it is the smallest standard format that holds every layer on it — mono, stereo, 5.1 or 7.1 — so a track of stereo layers is a stereo track, and a track that also carries a quad or 5.0 layer is a 5.1 track in which the quad plays from L, R, Ls and Rs and the stereo layers from L and R, the seats a layer does not have left silent. A mono layer plays from the centre, or from both sides of a stereo track. Channels that have no speaker in 7.1 — the heights of a 7.1.2 or 7.1.4 bed, the mics of a multi-mic recording, an Ambisonic file’s components — arrive on mono tracks of their own directly after their track, named for what they are (
BG 3.Ltf,FX 2.Boom). With Tracks: Multi-mono each timeline track becomes a mono track for each speaker its layers use (.L,.R,.C,.LFE,.Ls,.Rs, and so on), in that order and never an empty one.Which speaker a channel is comes from the file itself: the channel names a library writes into it (Pro Tools, Soundminer and the large libraries all do), then its channel mask, then the channel order set in Settings. Where a file says nothing reliable, set its Channel layout in the library (12.1) — Discrete (multi-mono) for a multi-mic recording, Ambisonic for B-format. Your bus declarations do not apply in this mode — see 14.8.
Tracks: Multi-mono / Multichannel — how a track’s channels arrive. Multi-mono gives each channel its own mono track, named by role, which is what Pro Tools has always taken. Multichannel delivers one stereo, 5.1 or 7.1 track whose channels are combined in the session, so
FX 01staysFX 01instead of becomingFX 01.LandFX 01.R. The audio written is identical either way — only the session’s shape changes. A mono layer on a stereo track arrives on both sides at −3 dB of clip gain, which is where you heard it: the centre.
All clips are written as 24-bit Broadcast WAV with their timecode stamped into the BWF, so if a clip is ever moved or re-imported it will spot back to its original position. Everything is exported at the project sample rate (set it to match your session on the Project tab before you export; see 15.5).
One thing to know about levels in an AAF. Sonic Alchemist writes its per-clip gain into the AAF, but Pro Tools discards clip-gain envelopes on import and keeps the track automation instead. (A Pro Tools session, below, needs none of this: the level work arrives as each clip’s own gain line.) If you want the balance to live on the clips — so a clip can be copied to a track with no automation and still sound as intended — select the clips after import and use Clip ▸ Convert Volume Automation to Clip Gain. One command, and the shaping moves where you want it.
REAPER. REAPER does not read AAF, so for a REAPER room choose Format: REAPER. The export writes <name>.RPP beside the same Audio Files/ folder an AAF would carry, and it opens as the session you built: a folder track per bus carrying the bus fader and mute, the bus’s tracks inside it, and every clip with its handles, its fades — equal power where it crossfades — and its clip gain on the item. With Clip gain on, the Intensity shaping arrives as an editable take volume envelope. Clips that overlap stay overlapped, exactly as they play. A stereo or surround clip is one multichannel file in standard WAV channel order, and a declared 5.1 or 7.1 track is a six- or eight-channel REAPER track; Tracks does not apply, because a REAPER track always carries all of its channels. With Markers on, every event becomes a region named after it — its recipe, or its keywords — so File ▸ Render with Bounds: Project regions and $region in the file name gives one file per event, the usual way assets leave REAPER. The project’s start timecode becomes REAPER’s project start. If a picture is loaded it arrives as a video track at the top, referred to by its file name only; REAPER asks where it is the first time the project opens.
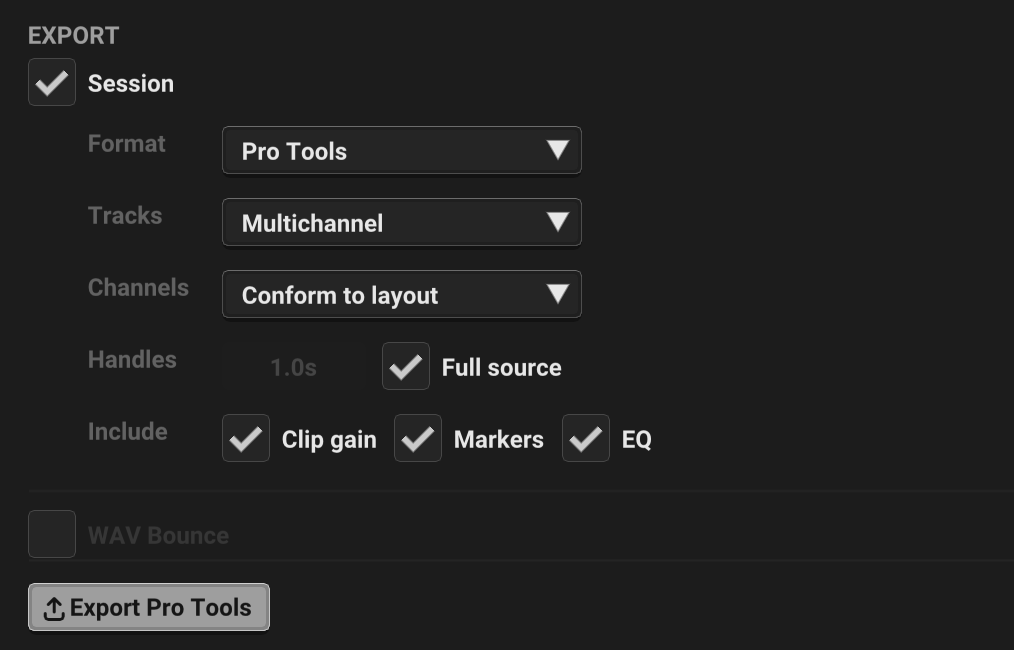
Pro Tools. Choose Format: Pro Tools to deliver a Pro Tools session as well as the AAF. The export writes the AAF exactly as above and, beside it, <name>.ptx on the same Audio Files/ folder — a session Pro Tools opens directly, with nothing to import. The AAF’s tracks arrive named and formatted as in the AAF (mono, stereo, 5.1 or 7.1, following Tracks), gathered in a folder per bus and coloured as the bus. Every clip is trimmed to what you heard with its handles hidden behind it and keeps its timeline colour; its fades come with it — equal power where it crossfades, and a fade-out as equal gain, the nearest Pro Tools has to the app’s own. With Clip gain on the level work is the clip’s gain line, with EQ on its EQ is the clip’s own Clip EQ (11.7), and with Markers on the sync points are memory locations. The session starts at the project’s timecode. Import Session Data shows it as created by Sonic Alchemist, and the session records only where you saved it.
It is written at 44.1, 48, 96 or 192 kHz and at 23.976, 24, 25, 29.97 (drop frame or not) or 30 fps. At any other rate the AAF is delivered alone and Activity says why. If anything stops the session being written, the AAF beside it is still complete, and the export says so.
14.2 WAV Bounce#
Turn on WAV Bounce to export 24-bit Broadcast WAV files. Choose any combination of:
- Mix — a single file of the finished balance, exactly as you hear it.
- Stems — one file per bus.
- Tracks — one file per track slot.
- Clips — every layer as its own timestamped BWF.
Every WAV carries each event’s EQ (11.7), as you hear it. The EQ option in Session is for sessions only: a WAV is a print, and an EQ you set is part of the sound.
Stems, Tracks, and Clips are written dry, with the reverb delivered as its own stem (see 14.4), so you keep the wet as a separate layer to balance in your session. Only the Mix has the reverb summed in.
Layout sets the channel format of the Mix and the Stems: Stereo, 5.1, 7.1.4, or AmbiX. Tracks and Clips are unaffected — they carry individual sources and stay as they are. The panel shows the exact channel order it will write, so you can check it before the export rather than after: 5.1 as L R C LFE Ls Rs, 7.1.4 as L R C LFE Ls Rs Lrs Rrs Ltf Rtf Ltr Rtr, and AmbiX as W Y Z X. AmbiX is first-order ambisonic (ACN/SN3D) — four channels carrying the scene itself rather than a speaker layout, for material heading into an ambisonic workflow or a renderer downstream.
How sources fill that layout is a separate decision — see Spatialization (14.3).
Normalize applies a final loudness pass to the Mix only, at −14 LUFS for streaming, or −16, −18, or −23 LUFS for EBU R128. It measures the way a broadcast meter measures and applies a single broadband gain; on a surround Mix it measures the front pair and moves every channel together, so the balance you built is preserved. This is a later, separate stage from the per-bus Loudness in the Project tab (15.4) — that one shapes the internal balance while you work, this one sets the delivered level of the finished file. They stack.
14.3 Spatialization#
A surround export — 5.1, 7.1.4 or AmbiX — writes every event where its Panner puts it (11.6). There is nothing to set here.
One rule governs it: a multichannel source always conforms by role. A 5.1 recording lands on the 5.1 channels of the target as recorded. Only mono and stereo sources are ever panned, being the only ones with no layout of their own. Each source role goes to the matching target role at unity; a role the target does not have folds to its nearest neighbour on the same side, 3 dB down; a target channel with nothing to feed it stays silent. Nothing is invented — no synthesised LFE, no surround made out of front material.
A surround bounce commits its panning. When you want those decisions to stay open, export a session to mono and stereo tracks, or with Keep source channels: every layer arrives on its own track, unpanned, and you pan it in your DAW. Declared 5.1 and 7.1 tracks carry their panning in the audio, as a bounce does (8.12).
The reverb is a decorrelated bed across the whole target, present at the front. It follows whether the reverb is on at all.
14.4 Reverb#
If the reverb is on, Wet stem exports the reverb’s wet signal separately — as Reverb.L / Reverb.R tracks in an AAF, or a Reverb Stem file in WAV. This is the wet to sit beside the dry Stems, Tracks, and Clips; the Mix already has the reverb summed in and limited — it is what you were listening to — so it needs none. Wet stem is off until you turn it on, so an export never arrives with a track you did not ask for.
14.5 Exporting#
Select the export button. The application warns you if there is nothing to export yet — if the timeline is not built, or no format or WAV type is chosen — and reports when the export is complete, with the file count.
If an export of the same name is already in the folder, a Replace …? question appears beside the button: Replace writes over it, Keep leaves it and lets you choose another name. Nothing is replaced until each new file is finished: the previous ones are set aside, a part of the export that fails puts its previous files back (the message names what failed and what was written), and stopping the export puts all of them back.
While the export runs, the activity icon shows its progress, and the activity list a Cancel button. Cancel stops it and puts everything back as it was — Export cancelled – no files kept — and the previous export of that name, if there was one, is untouched. Once the files are written and only the provenance record is left, Cancel goes away: by then the export is all but done.
14.6 Naming and folder#
The export takes its name from your project by default; change it if you like. Whatever you type names both the export folder and every file in it — the AAF and the WAV bounces alike. So an export named Harbor Night gives you a Harbor Night folder holding the AAF (Harbor Night.aaf with its Audio Files) and whichever WAVs you chose (Harbor Night.wav for the Mix, a Harbor Night - Reverb.wav stem, and Stems, Tracks, and Clips subfolders named to match). A Harbor Night delivery.txt goes in with them where the delivery was fitted to a layout (14.8), and Harbor Night.saprints.json (17.4) if Source record in delivery folder is on. Everything an export makes sits inside its one folder, so zipping that folder and sending it carries the audio, the note and any provenance together, with nothing left behind. Nothing is date-stamped; you keep a version by naming it.
14.7 Export Variations#
Right-click an event, a chain, or a selection and choose Export Variations to render a set of fresh takes as numbered files — a whole variation set from one designed sound, ready to drop into Wwise or FMOD as a random container or multi-instrument.
The submenu is three rows: the export action with its count; the name, filled in for you, and the count from 1 to 999; and a row of chips you click to cycle — sample rate, bit depth, channels (mono, stereo, 5.1, 7.1, 7.1.4 or AmbiX), reverb or dry, and one-shot or loop. Everything but the name is remembered across projects, so you set your habits once.
A surround take is rendered exactly as a surround mixdown is — every layer panned where it is in the Panner and the reverb spread round the room, as you monitor it — and a Scatter’s particles each at their own direction in the take’s own layout, above you as well in 7.1.4. 5.1 is written with its speaker mask, 7.1.4 in Pro Tools’ plain 12-channel order, AmbiX as a first-order scene; dither, levelling, metadata and loops are the same as for a stereo take.
Loop makes every take a seamless loop, for game ambiences — rain, crickets, fire, a crowd, a drone. Each take is exactly as long as the selection, and whatever rings on past its end — a cloud’s last hits settling, a bed’s crossfade, the reverb’s tail — is folded back onto its start, sample for sample, so the end flows into the start as it would in time: no seam, no crossfade, no click, however often it repeats. The file says so too: a loop over all of it in its smpl chunk, which samplers and game engines pick up, and Loop in its name and metadata. With a count above one you get that many different seamless loops of the same sounds, for a random container. On the timeline nothing is folded: there an event rings out naturally, and every hit of a Scatter has its own fades, so it never clicks at either end.
16-bit files get flat dither, not noise-shaped; digital silence at the head and tail stays exactly zero, and a re-export of the same take writes the same file. 24-bit files are not dithered.
Each take re-rolls the library choice, so a different source is used every time, and timing and pitch vary from take to take. Every file is a different but coherent reading of the same intent rather than a copy. Locked layers stay constant, which is how you steer it — lock the layer that carries the identity of the sound and let the rest vary. Fixed material, a Clip or a Bed inside a chain, is carried through unchanged, so a chain exports whole.
Naming. The name is proposed from UCS, matched against the keywords you typed — or, where you typed none, against the sources the build settled on. Across a selection, Hero events lead and the category is decided over the whole composite. Where nothing matches with confidence, nothing is guessed: you get a name built from your own words.
Two styles, set in Settings. Simple gives the lower-case, underscored form middleware expects — metlimpt_anvil_01.wav and up. UCS-tagged gives the delivery form, composed per take from the files that take used: WATRSplsh_Splashes_Debris. Type over it if you want something else; the numbering follows.
Metadata. Each take carries a description, a keyword list and its category identifiers, written into the broadcast WAV header and the iXML block. The content is inherited from the files that composed that take, together with the words you typed, so every take carries its own. Material that arrived untagged still leaves with a usable description. Bake the reverb in and the take says so.
Level. With Normalize on, each take is peak-normalised to the level you set in Settings, so a set arrives consistent. With it off, takes keep their natural relative levels and are only limited — brought down if hot, never pushed up. Either way nothing clips.
Every take passes through the same deconfliction the timeline uses. Files are written to a Variations folder in the project, and the folder is revealed when it finishes.
Your timeline is untouched. Nothing is rebuilt, and playback is unchanged after the export.
14.8 Delivering to a session layout#
Sonic Alchemist builds with as many tracks as the work needs; a mix stage works to a fixed layout. This section is how the two meet.
The layout is declared on the busses, and nowhere else. Open a bus card in the Project tab and declare what it holds — six mono then four stereo, one 5.1 (15.2). That declaration is the delivery contract. A bus that declares nothing delivers at the session’s full width, growing as it needs to. A bus that declares tracks delivers exactly those tracks, in that order, in those formats — in the AAF, even a declared track with nothing on it is present. And there is nothing to choose at export: no template to pick, no mode, no conform checkbox. The Export tab only ever answers which files do I write, and how do they arrive.
Under the number, nothing changes. While a bus’s material fits inside its declared tracks, every layer ships separately, with the balance you built riding on adjustable clip gain (14.1). Nothing is ever combined merely because combining is possible.
Over the number, layers are combined — never dropped. When more layers overlap than the declared tracks can hold, the overflow folds: overlapping layers are summed into one clip, so the material fits the contract with nothing missing. What folds together is chosen in this order. Never across a bus — a bus is a category, and folding impacts into backgrounds is the one operation nobody can defend to a mixer. Within an event first — a door slam becomes one clip, sometimes two or three, before anything reaches across to a neighbouring event. And what a mixer must keep separable stays separable: sub material keeps its own clip, a Hero transient is not folded into its own tail, and Hero layers are not folded into supporting ones. Within those limits, the two most spectrally similar overlapping layers combine first — the ones that were competing for the same part of the spectrum anyway.
When a moment is so congested that no pair satisfies all of that, material is still not thrown away. The fit gives up one guarantee at a time — first a transient may join its own tail, then a Hero a supporting layer, and only at the last resort the sub separation — and any fold that needed such a step is named for what it is in the delivery note. The only material that can ever be left out is a layer you have pinned Never fold when there is genuinely nowhere left for it to go, and the export warns you loudly rather than letting you find out on the stage.
You learn all of this while you edit, not on delivery night. A declared bus card carries its live count — 6 x mono, 4 x stereo, 19 used → 4 folds — neutral while everything fits, accented when the bus will fold, red only when something cannot be placed. The same summary sits at the bottom of the timeline, in the tooltip of the Delivery button beside the pencil (38 → 12 tracks, 4 folds), on every tab, all the time.
Click either line to hear and see the delivery. The timeline compacts — same busses, same order, fewer rows — and the layers of each fold slide together onto the one clip they will become. It is not only a picture: while the preview is open, the monitor plays the delivery, so “what did that fold cost me?” is answered the way it should be, by listening. Solo a folded layer to hear it alone, exactly as always. Press Escape, or click the line again, and the session comes back. The preview changes nothing — the session itself is never modified.
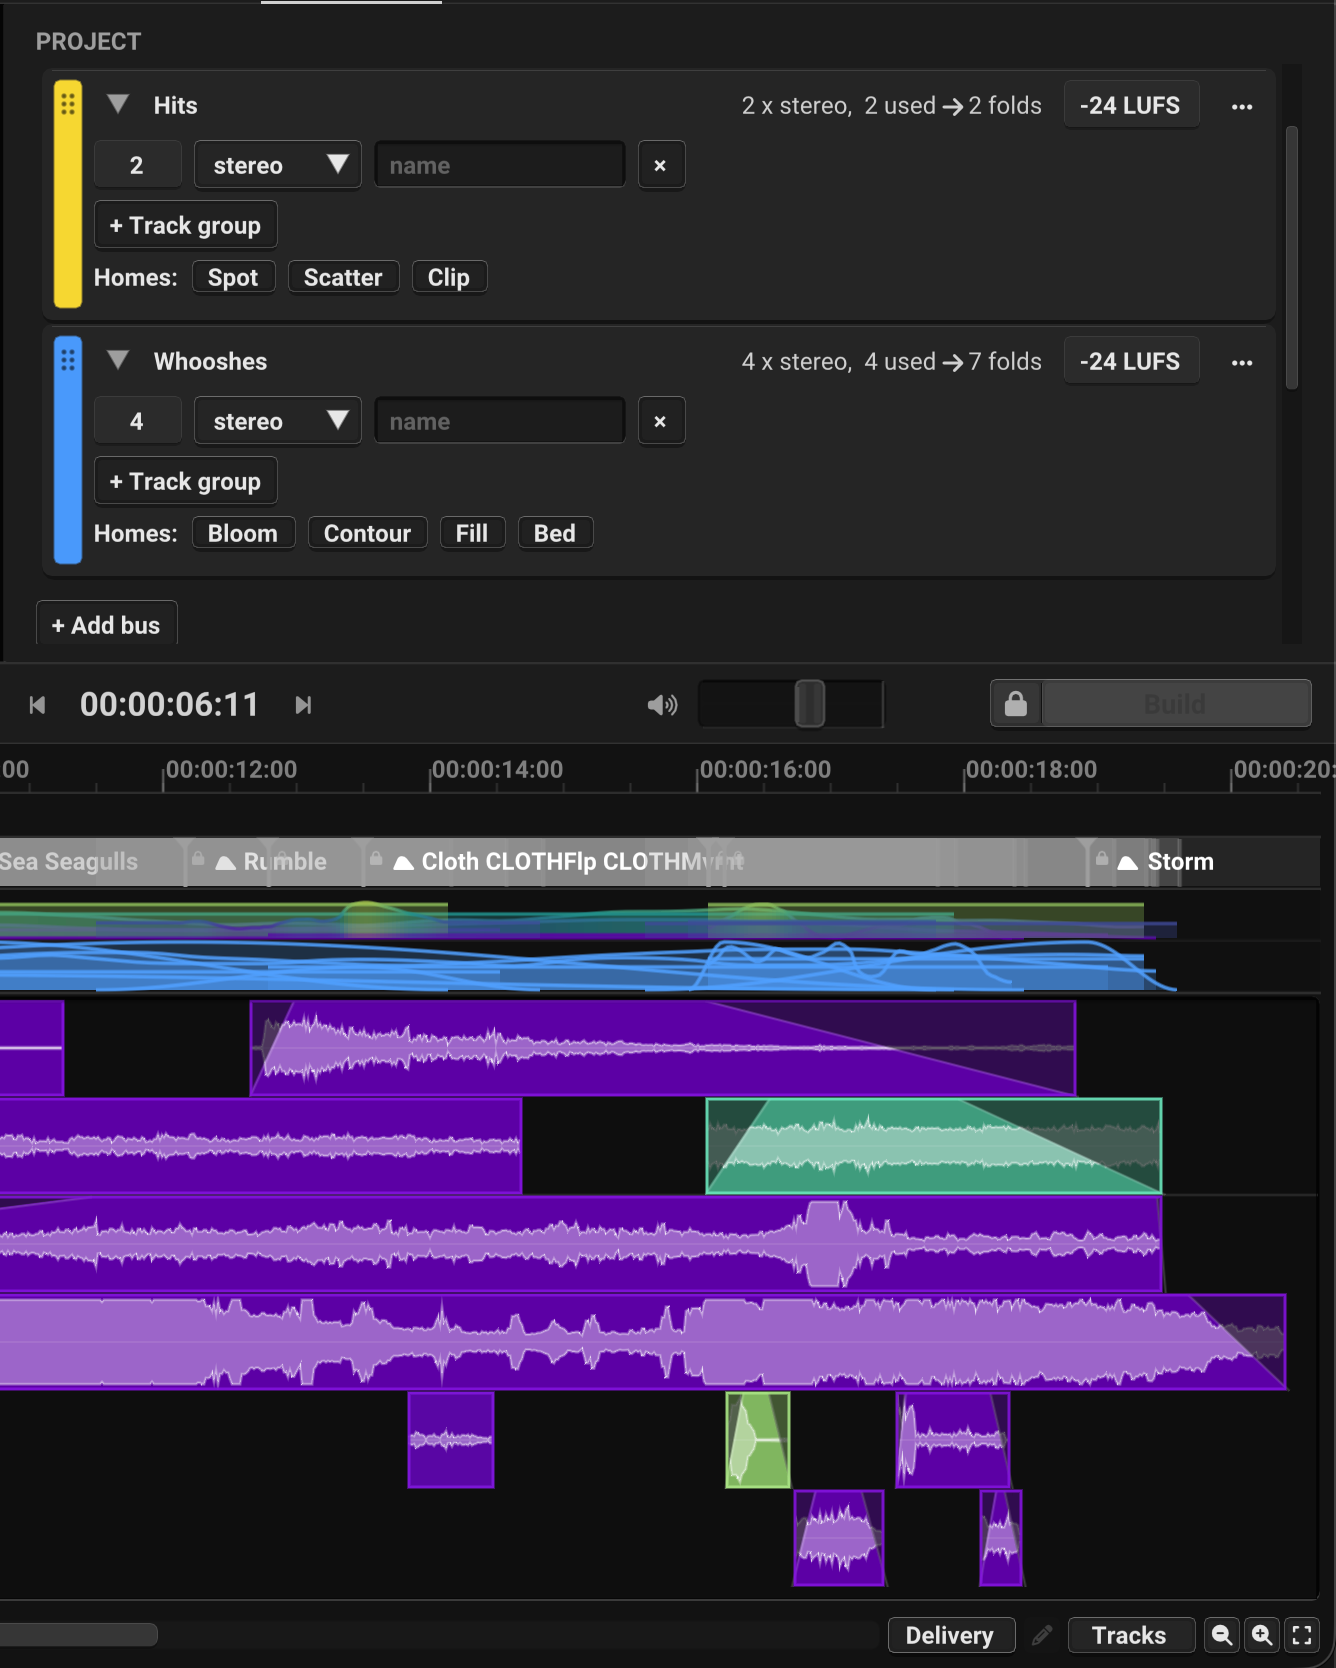
Older pins. Projects from earlier versions may carry per-layer delivery pins (never fold, fold into). They are still honoured; the layer’s … menu shows a line to reset one (11.4).
What a folded clip is. One clip, delivered at unity gain, with its members’ balance and timing baked into the sum — what you approved is what it sounds like, and nobody accidentally remixes the inside of it. Its boundary fades arrive as real, editable fades, and with Handles on (14.1) the clip carries material past its edges, re-read from the members’ own source files, so it trims outward in your DAW like anything else you cut. And a fold is not a one-way door: every folded clip carries the record of what it absorbed, so Unbounce to Source (11.10) opens it back into the exact layers it was made from — in the project, or from the delivered BWAV months later (17.4).
A note travels with the delivery. A fitted export writes a plain-text delivery.txt into the export’s folder, beside the audio: what each bus declared and what it used, every fold with its members and the reason it was made, and a warning if anything could not be placed. It is written for the person opening the session in a mix room, not for this application.
One export mode stands outside all of this: Channels → Keep source channels (14.1). It is a pure passthrough — every layer arrives with its own channels, handles intact, nothing combined, nothing processed — and the declarations do not apply to it, because a passthrough that quietly reshaped your material would not be one.
When a bus does run red, the two remedies are both yours: raise the declaration, or select events on the timeline and Bounce to Clip (11.10) yourself, where you can hear what you are committing to.
15. The Project Tab#
Everything on this tab is saved with the project. The Settings tab (Chapter 16) holds what belongs to your machine and follows you between projects.
15.1 The track list#
Each bus is a card carrying its name, what it holds, and its target loudness. A new project has three — FX A, FX B and FX C. You can have anywhere between one and sixteen, and rename them freely.
Order. Drag a card by its colour bar — a line shows where it will land — and the order follows everywhere: the timeline, the Mixer, the inspector and the export.
Colour. Click the colour bar at the left of a card to pick the bus’s colour. It follows the bus everywhere — the timeline, the Mixer, and the tracks and folders of the Pro Tools or REAPER session you export.
Homes. The chips on each card are the shapes that default to that bus. Click a chip to move a shape’s home. Out of the box: Spot, Scatter and Clip on FX A, Bloom and Contour on FX B, Fill and Bed on FX C. Any shape can sit on any bus, and an event overrides its home from the inspector (11.1).
Delete a bus and its shapes re-home — foreground shapes to the topmost bus, backgrounds to the bottom. Events pinned to it return to their home.
15.2 Tracks and channel formats#
This is where you describe your DAW template, so the export arrives in it.
Open a card and declare what the bus holds: an ordered list of slots, each a count and a format — mono, stereo, 5.1 or 7.1. Each group takes an optional name; without one its tracks deliver as FX A 01, FX A 02, with one as FX A <name> 1.
Leave the list empty and the bus is automatic: tracks are created as the work needs them.
A declaration is a description, not a cap. The timeline lays out to match it, so an event’s layers stay together rather than scattering across the bus. If a dense moment needs more tracks than you declared, it gets them — nothing is dropped, muted, or built thinner. Fitting the work to the track count happens at export, where the layers that will not fit are combined rather than discarded (14.8).
The card’s summary line shows how the bus stands against its declaration. Click it to preview and hear the delivery.
A declared 5.1 or 7.1 track takes surround sources as they are, and can also be filled from mono and stereo layers panned into it.
15.3 Saved layouts#
Layouts saves the whole arrangement — busses, their tracks, their targets, and the home map — under a name, and loads it into any project. Set a show’s layout up once and everyone on it can load the same one. Set current as default makes the layout you are on the one every new project starts on, marked (Default) in the list; Unset as default returns new projects to FX A, FX B and FX C.
Loading re-flows the project onto the new busses. The tooltip states the consequence before you click: how many busses you are going from and to, how many pinned events keep theirs, and how many revert to automatic. Pins match by name. One Undo restores everything.
Import track list… builds a layout from a session — a Pro Tools session text, or a REAPER project. In Pro Tools, select the tracks and use File ▸ Export ▸ Session Info as Text with Selected Tracks Only.
Each track comes in mono, stereo or surround as it is in the session. Tracks sharing a prefix that ends in a number become one bus, and what follows the prefix names the group within it. A trailing Mono, Stereo or 5.1 is read as the track’s format rather than part of its name. Every name is editable afterwards, and importing is undoable.
From REAPER, choose the project (.RPP). Each top-level folder becomes a bus and the tracks inside it become its tracks, in order; a folder within a folder only groups. A track named after its bus and a number (SFX 3) is a plain track, and any other name (Footsteps) names its group within the bus. A six- or eight-channel track is 5.1 or 7.1; any other track is mono when everything on it is mono and stereo otherwise, since REAPER tracks are stereo unless told otherwise. Top-level tracks outside any folder are grouped by name, as they are from Pro Tools.
The Pro Tools Round Trip project folder ships with a session and its text export, if you want to try this before using one of your own.
15.4 Loudness#
Normalize settles each bus into a loudness range you choose, so they sit at workable relative levels while you build. It is a working balance, not a mix.
What matters in the defaults is the spacing between busses rather than the absolute numbers. The absolute level sits hotter than a dub stage would, because editorial happens on headphones and nearfields rather than in a calibrated room. It is a monitoring choice, not a delivery target.
Measurement follows ITU-R BS.1770. The change is applied as clip gain and carried into your DAW as adjustable clip gain or volume automation, never baked in.
This is not the Normalize in the Export tab (14.2), which sets the delivered level of a finished Mix. They are separate stages, and they stack.
15.5 Timeline#
- Sample rate — for playback and export. Match your DAW session. 44.1 / 48 / 88.2 / 96 / 192 kHz; default 48 kHz.
- Frame rate — locks to a loaded video; otherwise set it yourself. 23.976 through 120; default 24. It travels in the AAF, with the start timecode below, so a delivery opens at the rate you worked at.
- Start timecode — offsets all clip positions in AAF and BWF export. Match your session.
- Timeline duration — the length of the timeline when you are not working to a video.
- Video start — where a loaded video begins on the timeline, for placing a clip within a longer timeline.
- Project description — free text, shown in the launcher.
15.6 Musical Scale#
Quantise clip pitches to a musical scale, so a stack of pitched material agrees instead of clashing.
Each clip’s pitch is detected from its own audio and nudged to the nearest degree of the scale. Clips with no clear pitch are left alone. A Clip event — your own placed file — is never tuned: its pitch is the one you give it.
Choose a scale — Major, Natural Minor, Chromatic, Maj7, Min7, or Power (1–5) — and a root note. Correction always goes to the nearest degree, never more than half the gap between neighbouring degrees: a dense scale keeps every nudge small, while a sparse set such as Power (1–5) can pull material a long way. Off leaves all pitches untouched.
A single event can opt out or force the behaviour from its inspector (11.1).
16. The Settings Tab#
Settings holds the application’s preferences, your machine’s audio configuration, and your license. These follow you from project to project; the things saved with a project are on the Project tab (Chapter 15).
16.1 Application#
Under Audio:
- Driver — Windows only: WASAPI or ASIO®. See 16.2.
- Device — the device used for playback; the list refreshes as devices change.
- Sample Rate — the rate playback runs at. It follows the project; change it on the Project tab (15.5).
- Buffer Size — how much audio is prepared ahead of the speakers. See 16.2.
- Format — the layout used for playback. See 16.2.
Under Picture:
- Video Sync Offset — the offset between picture and sound. See 16.3.
- Picture Output — shown when a second display is connected: Native or Draft, the Display Offset, and a line naming the display. See 5.2 and 16.3.
Under Workflow:
- Follow selection — whether Audio Focus (9.1) stays zoomed as you move between events, revealing each one, or returns to the previous view on the next selection. Off by default.
- Import Chains as groups — whether a placed Chain arrives as one linked group or as independent events (4.6).
- Extend short sources — whether a source shorter than its event loops to fill it. On by default; turn it off for libraries of very short one-shots that should sound once.
- Auto-save — saves the project at the interval you choose and keeps the last ten versions. See 16.4.
Under Delivered files — what an exported file may carry about how it was made (17.4). Every file names its sources by file name only — never by the folder they live in, your user name or your drive — and carries what Unbounce to Recipe and Unbounce to Source (11.10) need:
- Confidential delivery — the files you deliver carry their audio, their names and the standard broadcast date and time, and nothing that traces their making: no Unbounce to Source data inside them, no source record beside them, no stamp in their names and no Sonic Alchemist reference in their broadcast header. Files inside an AAF keep the random code in their names, which is how a session coming back from Pro Tools is matched (17.5); it says nothing about you. The record of every export still stays on this machine. Off by default; while it is on, the two settings below are greyed out.
- Source record in delivery folder — adds a
.saprints.jsonto each export’s folder, so another machine can recover the exact layers of a file whose own metadata was stripped (17.4). It holds no user name, computer name, project name or folder paths, but it does describe the session, so it is off by default. - Source stamp in filenames — appends a short code to exported filenames. It is the one marker that survives a tool rewriting the audio while keeping the name, so it widens what Unbounce to Source (11.10) can recover from. Off by default, because it puts machine text in a name you hand to someone else; turn it on if you work at a scale where tracing matters. Files written inside an AAF always carry it, since nobody reads those names. Below it, a small line shows the export history’s size — the permanent record of every export (17.4). Nothing there is ever deleted automatically.
Under Export Variations:
- Filename style — Simple or UCS-tagged (14.7).
- Normalize takes to — whether each take is peak-normalised, and to what level, or keeps its natural level (14.7).
Under Demo Content:
- Restore Demo Content — copies back any of the installed projects, recipes and chains that are no longer in your Documents folder (17.1). Nothing you have changed is overwritten.
16.2 Playback format#
Format sets the layout used for playback: Stereo, the speaker layouts your interface can carry, and Headphones (binaural). Stereo is the default.
The speaker layouts play the decode itself rather than a fold of it, every event where its Panner puts it, as the export does (11.6). A layout your interface cannot carry is greyed out, with the channel count it needs shown on hover; if the device refuses that count, monitoring returns to Stereo.
Beneath the format sits a warning when the device is running at a different rate from the project. Set the device to the project rate for a clean path.
Buffer size. How much audio is prepared ahead of the speakers, in samples, with the delay it comes to shown beside it. 512 is the default and about 11 ms at 48 kHz.
Playback stops for a moment when you change it, and output latency is re-measured, so picture stays aligned with sound at every size. The interface has the final say: some allow only certain sizes, and if yours moves to a nearby one the line beneath Format says which size it is really using.
On ASIO the setting is greyed out, because the driver owns it there. Use Driver Settings instead, and whatever you set in that panel is what playback uses.
Driver — ASIO. Windows only. The Driver setting chooses how the application reaches your interface. WASAPI is the default and needs nothing installed. ASIO uses the interface’s own driver, with its latency reported rather than estimated and no Windows rate conversion. With no ASIO driver installed, choosing it returns you to WASAPI.
ASIO takes the interface exclusively. While Sonic Alchemist holds it, other applications cannot play through it, and if another application already holds it the device will not open — the notice says so. Your choice of driver and device is remembered between sessions.
Driver Settings opens the interface’s own ASIO panel, which is where buffer size and clock source live. Sonic Alchemist does not duplicate those controls: it takes the buffer size the driver prefers, so whatever you set in that panel is what playback uses, and Buffer Size shows it once the panel closes. Rescan looks for ASIO drivers installed since the application started; playback stops for a moment while it does.
If the reading beneath Format says the driver is clocked at a different rate from the project, the driver did not take the project’s rate — usually because it is locked to an external clock. On ASIO nothing converts between the two, so playback runs at the wrong speed rather than merely losing quality. Change the clock source in Driver Settings, or set the project to the rate the interface is locked to.
ASIO is a trademark of Steinberg Media Technologies GmbH, registered in Europe and other countries.
Headphones (binaural) folds the full decode to headphones through a head model. It is a check on where things are sitting when there are no speakers in the room, not a delivery-grade binaural render.
LFE. Panned mono and stereo layers contribute nothing to the LFE channel, here or in a file. Where LFE appears, a source carried one of its own.
Output routing. On an interface wider than stereo, for when its outputs are not wired in the order the application assumes. Identify plays pink noise on one physical output at a time, bypassing the routing, so you can work along the row and hear which is which. Output routing then assigns a physical channel to each role, and Reset map returns to canonical order. It applies to every format, and is saved per device and channel count.
16.3 Video Sync Offset#
Output latency is measured and compensated for you; the figure shows beside the control as Automatic Compensation. Video Sync Offset covers what measurement cannot see — buffering inside the interface itself. If sound runs late against picture, raise it.
A second display adds a delay of its own. Display Offset, under Picture Output, is for that alone and applies only to the picture on the second display. If the picture there runs late against sound, raise it. Set it once per room. HDR sources are shown as SDR, and the activity list says so.
16.4 Auto-save#
Turn on Auto-save to save the project at an interval you choose, keeping the last ten versions as rotating backups in the project’s Backups folder. Auto-save needs a project that has been saved at least once. See 17.3.
16.5 Updates#
Once a day, Sonic Alchemist checks whether a newer version exists — a request carrying nothing about you or your work. When one is found, a dot appears on the Settings tab and the Updates section names the version and what is new; View update opens the downloads page at sonomagic.com, where you download and install it yourself. Nothing is downloaded or installed on its own. Once the new version is running, the dot is gone, and its first launch checks again at once.
Check now checks on the spot. Check for updates automatically, turned off, stops the daily check entirely, and the network is never reached for updates at all.
16.6 License#
Shows your license type and status, the machine, and the account. Links let you enter a key or deactivate this machine. Deactivating asks first, and saves your project before it does anything (an untitled one asks where); if the save doesn’t happen, nothing is deactivated. Whatever the license says, your work can always be saved: Save works from the menu and the keyboard, and the activation screen offers it whenever there are unsaved changes. See Installation and Licensing (Chapter 2).
17. Projects, Saving, and Backups#
17.1 The project, and what travels with it#
A project is a .saproj file, but it does not sit alone. Saving creates a self-contained project folder around it:
ProjectName.saproj      the project itself
Audio/                  every source file the project uses, copied in
Backups/                rotating auto-save backups
On save, every file your built events use — and every file you have pinned — is copied into Audio/, and the project references those copies rather than the originals scattered across your drives. A finished job can be archived, handed on, or moved to another machine and it opens intact. Saving never waits for the copying, which happens in the background. Your indexed libraries stay external, referenced by path, since they are shared across projects — so a project file names those folders, and is best kept within your own team.
While a project is open, a small .lock file beside it tells other copies of Sonic Alchemist — another window, or a colleague opening the same synced folder — that it is in use. It holds a random code, never your computer’s name.
Recipes and chains travel without your folders. A saved recipe or chain names the files it pins by file name only, with a fingerprint of their audio — never the folder they live in. Sonic Alchemist remembers privately, on this machine, where each one is; hand a recipe to someone else and it finds the same sound in their libraries by its content. Recipes and chains saved by earlier versions are rewritten this way the first time they load, whenever the files they pin can still be found.
Create a project from the Project Launcher or File → New; open recent work from the launcher or File → Open Recent. In the launcher, New Project starts one; select a recent project and choose Open (or double-click it); Browse… opens one from anywhere on disk. The launcher appears at startup unless you turn it off, and reopens from File → Project Launcher…. Save with Cmd+S, Save As with Cmd+Shift+S.
The installed projects. The three projects that ship with the application are delivered to your Projects folder at first launch and sit at the top of the launcher’s list. Anything added in a later update arrives at the next launch, on new and existing installs alike. Once delivered they are ordinary projects: edit them, save over them, or delete them. A deleted one does not come back on its own — Restore Demo Content in Settings (16.1) copies back whatever is missing, and never overwrites a file you have changed.
Double-clicking a .saproj opens it in the current window rather than launching a second copy. If the project you are leaving has unsaved changes, the title bar offers Save, Discard or cancel first.
Saving is crash-safe: a new save is written fully before it replaces the old one, so an interruption cannot leave you with a corrupted project. The worst case is that the last save did not complete and the previous version is untouched.
17.2 If a file goes missing#
A project opens even when something it references has moved.
If the video is missing, the project opens without it and everything else works; relink and carry on. If source audio is missing, the project opens with all its events and edits intact, and the affected layers degrade to flagged silent gaps until the source is found. Nothing is blocked from opening or from building by a missing asset.
Most of the time there is nothing to do: files are tracked by content identity, so a source that has merely moved heals itself. Anything that cannot be found is gathered under Missing sources in the Library tab (12.6).
17.3 Auto-save and backups#
With auto-save on (16.4), the project is saved at the interval you choose, from one minute to thirty, and the last ten are kept as rotating backups in Backups/. ProjectName.backup1.saproj is always the newest, counting up to the oldest. Each auto-save drops the oldest, shifts the rest down, and makes the current state backup 1. To recover, open the backup like any project — duplicate it first if you want to keep the rotation intact.
Auto-save runs only once a project has been saved at least once, and holds off while a build or export is in progress. If the application does not shut down cleanly, it says so on next launch and points you to your most recent backup.
17.4 The record behind an export#
Every export leaves a record, and none of it asks anything of you.
Each exported file carries a stamp of its own identity, in its metadata and in the broadcast header. A record of what was rendered — which sources, which regions, at what gain, with which curves — is kept on this machine. With Source record in delivery folder on (16.1), a copy of it is also written into a .saprints.json inside the export’s own folder, so a delivery folder carries its provenance with it. This is what makes Unbounce to Source (11.10) work months later, on files that have been through other hands: the file is recognised by its name, its stamp, or its audio content.
What leaves with a delivery. Anything inside or beside a delivered file goes wherever the file goes, so it holds nothing that identifies you or your machine. Sources are named by file name only, with a fingerprint of their audio — never the folder they live in, your user name, your computer’s name or your drive layout — and they are found again on any machine by that fingerprint. An AAF points to its media in the Audio Files folder beside it, not to a location on your disk. A mix or stem of a range describes only what is in that range, and the files you have banned never travel. The record on this machine keeps the full detail; it never leaves it. Confidential delivery (16.1) sends the audio without any of it.
The records are plain JSON. They accumulate slowly — Settings shows the total under Export history — and nothing is deleted automatically. Click that line to show the folder, and copy it wherever you back up your work. Deleting the .saprints.json beside a delivery breaks nothing; it is a travelling copy.
Source stamp in filenames (16.1) adds a short stamp to exported filenames, so a file survives programs that rewrite everything else. Off by default. Files inside an AAF always carry it — a random code, with the clip’s original position, which is how a session coming back from Pro Tools is matched (17.5).
17.5 A session comes back — importing an AAF#
Export a session from Pro Tools as an AAF and drag it onto Sonic Alchemist — or choose File → Import AAF Session… — and the session is rebuilt from it, however long ago the work left.
The Pro Tools Round Trip project folder ships with a session set up for this, and a Read Me that walks the loop out and back.
Every piece of audio in the AAF goes through the same recognition a returning file gets when you drop it on the timeline (11.10), and arrives as one of three things:
- Recovered. The sound originated here and its record was found — by its name, its stamp, its audio content, or a
.saprints.jsonbeside the AAF. It opens straight back up into the original events that made it, exactly as Unbounce to Source would, automatically. A sound that carries only its recipe rebuilds the same way, from this machine’s library. - Imported. Material that never touched Sonic Alchemist — the music, the dialogue, someone else’s effects — comes in as ordinary pinned Clips at their session positions, with their trims and clip gain. Nothing in the AAF is dropped.
- Skipped. A clip whose media cannot be found (referenced files that did not travel with the AAF) is left out and listed in the log, by name — never silently.
A multichannel or multi-mono sound arrives once: the six files of a 5.1 bounce are recognised as one print and open into one set of events, not six stacked copies. Pro Tools also writes every fade out as a clip of its own, and — when it exports for Media Composer — every edit that falls between two video frames as a one-frame “Sample accurate edit” clip. Each of those is matched, by its audio, to the clip it was cut from and folded back into it: a recovered sound re-renders its own fades, and an imported one comes back as one Clip with its true edges and its fades.
Or send the session as text. File → Export → Session Info as Text in Pro Tools carries the original clip names — and with them the identity — for every clip in the session, whatever the AAF settings were, along with frame-exact positions. Drop that .txt on Sonic Alchemist, or open it with File → Import AAF Session…, and the session comes back the same way. It holds no audio, which is exactly why it needs none: anything that originated here rebuilds from this machine’s library. Use the text when you want your own work back; use the AAF when foreign material has to come across with its audio. Both together is better than either.
How the AAF was exported matters. Pro Tools offers three ways to handle media, and they differ in how much of a sound’s identity survives the trip. Copy all audio files and Link to source audio keep it whole, and everything that originated here recovers. Consolidate from source audio re-renders every edited region into a fresh file under a new name, but the AAF keeps each clip’s original name, and the audio is still ours sample for sample — so it recovers too, as long as the original export is still on disk. What cannot come back is processing: a sound put through AudioSuite returns as its original layers, and the activity list says so.
Sounds come back where they now sit. Move a clip to another scene in Pro Tools and its events return in the new place, not the old one — measured against the audio that was sent, to the sample, even though Pro Tools snaps an AAF to video frames. A sound put through AudioSuite is found the same way when the process keeps its waveform (gain, EQ, Reverse); one processed beyond recognition, a wet reverb say, is placed by its edges instead, which is exact unless its head was also trimmed. Split a sound across the timeline and it returns split — each fragment a full event, with its keywords and curves, to rework where it now lies. And it comes back on the same material: a recovered event is pinned to the files that made it, so nothing is re-chosen behind your back and nothing arrives doubled. Where a source has genuinely gone, that layer, and only that layer, is chosen again.
What did not come back is not brought back. The import mirrors the session it is given: a sound whose clips were deleted, or left out of the export, is not restored, and the log names each one. A sound that returns with only some of its layers returns with only those.
Restored sounds go back to the busses they were made on. The export recorded your busses and which bus each shape lived on, so a sound returns to the bus of that name, made with its original tracks when the project has none. A sound that was on Auto stays on Auto when the project’s home for its shape is that same bus. Everything else follows the AAF’s track names: names matching your existing busses land on them; new names become new busses that adopt the AAF’s track list (15.2). A track the AAF leaves unnamed makes no bus, and its clips go to the home for their shape. The session start timecode is read from the AAF, so material lands at its session position.
The whole import is one undoable step, with nothing to configure first. Foreign material arrives selected, so you can audition it, keep it, or press Delete once. The activity list reports how many events were restored, how many were not in the returned file, and how many clips were imported or skipped.
It needs what a delivery folder normally has: the AAF’s media beside it or embedded in it, and — for exact recovery — the records in 17.4. The habits from 11.10 apply unchanged: keep the filenames, keep the exported audio.
The limits, plainly. Recognition is per sound, so a session that has been part-renamed comes back part-recovered and the report says which is which. A clip renamed in Pro Tools has lost the name that identifies it and arrives as an ordinary Clip. Opening up a clip you had trimmed returns the full layers, the material you trimmed away included; opening up one you processed in AudioSuite leaves that processing behind, because it was applied to the sum and never to the layers underneath.
18. Keyboard Shortcuts#
The shortcuts below are written with the macOS Cmd key. On Windows, use Ctrl wherever Cmd appears (so Cmd+S becomes Ctrl+S, Cmd+Shift+S becomes Ctrl+Shift+S, and so on); the un-modified keys — Space, the number keys, the letter shortcuts, and the punctuation keys — are the same on both. The few genuine differences: Delete shows a Del accelerator on Windows; the User Guide is Cmd+? on macOS and F1 on Windows; and Quit (Cmd+Q) appears on Windows as Exit (Alt+F4). Full Screen (Ctrl+Cmd+F) is macOS only; on Windows, maximise the window.
18.1 Transport and editing#
| Shortcut | Action |
|---|---|
| Space | Play / Pause |
| Escape | Deselect, exit draw mode, collapse the Events lane, or clear the active scene |
| B | Build |
| Cmd+Z / Cmd+Shift+Z | Undo / Redo |
| Cmd+X / Cmd+C / Cmd+V | Cut / Copy / Paste |
| Cmd+A | Select all events |
| Cmd+S / Cmd+Shift+S | Save / Save As |
| Backspace or Delete | Delete selected events |
, / . (hold to repeat) |
Nudge selection one frame left / right |
18.2 Events and structure#
| Shortcut | Action |
|---|---|
| 1 / 2 / 3 / 4 / 5 | Create Spot / Bloom / Contour / Fill / Scatter at the playhead |
| Up / Down | Select the previous / next event in time |
| Shift+Up / Down | Previous / next picture change or event to check (10.6) |
| E | Expand / collapse the Events lane |
| Enter | Scene cut at the playhead, or the work area as a scene |
| Left / Right | Move the playhead to the previous / next scene cut |
| Cmd+R (Ctrl+R) | Rename the selected scene, or the one at the playhead |
| Cmd+C / Cmd+V | With no event selected: copy a scene’s backgrounds / paste them onto the scene at the playhead |
| S | Create and name a scene from the work area, or arm the scene lane |
| Cmd+G / Cmd+Shift+G | Group / Ungroup selection |
| Cmd+L | Lock / Unlock selection |
| M | Mute / Unmute selection |
| D | Toggle draw mode |
| P | Panner — pan the selected event or events by hand |
| Q | EQ — shape the selected event or events (11.7) |
18.3 Work area and view#
| Shortcut | Action |
|---|---|
I / O |
Set work-area In / Out at the playhead, or clear it if already there |
| X | Clear the work area |
| A | Audio Focus — zoom to the selected event, or back |
T / R |
Zoom in / out |
Cmd+= / Cmd+- / Cmd+0 |
Zoom in / out / fit |
Cmd+1 … Cmd+7 |
Events / Project / Trace / Mixer / Library / Export / Settings |
| V | Picture to the second display, or back (5.2) |
18.4 In the Trace tab#
| Shortcut | Action |
|---|---|
= / - |
Accept / reject selected markers |
| ; | Import enabled markers as events |
| Cmd+A | Select all markers |
, / . |
Nudge left / right |
18.5 Menu commands#
| Shortcut | Command |
|---|---|
Cmd+N / Cmd+O |
New / Open… |
| (menu) | Project Launcher… |
| (menu) | Import Video… |
| (menu) | Import Markers… |
| (menu) | Import AAF Session… |
| (menu) | Place Clip… / Place Bed |
| (menu) | Bounce Selection to Clip |
| (menu) | Export Variations |
Cmd+S / Cmd+Shift+S |
Save / Save As… |
Cmd+Shift+E |
Export… (Cmd+6 opens the Export tab) |
Cmd+W |
Close |
Cmd+, |
Settings |
Ctrl+Cmd+F |
Full Screen (macOS) |
Cmd+Q |
Quit |
19. Parameter Reference#
This chapter collects the working ranges and defaults in one place. Display values are what you see and set in the interface; where a control reads differently inside a project file or export, that is noted. You do not need these to work — the defaults are sensible — but they are here when you want to know exactly what a control spans.
19.1 Event parameters#
| Control | Range | Default | Notes |
|---|---|---|---|
| Event volume | −24…0 dB | 0 dB | Per-event level (inspector mix row). |
| Layer volume | −24…+6 dB | 0 dB | Per layer, in the event list. |
| Pitch variation | 0…24 semitones | 0 (off) | Random per-layer pitch spread. |
| Fill layers | 1…24 | 3 | Spectral layers in a Fill. |
| Sync point | within the event | shape-dependent | Dragged on the intensity curve, on shapes with a body. |
| Priority | ordinary / Hero | ordinary | Per event (11.1). |
| Bus | any bus, or Auto | Auto — the shape’s home bus | Per event. Homes are set in the Project tab (15.1). |
| Pan | anywhere | C — played as it is | Per event, in the Panner (11.6). |
| EQ low cut | off, 20 Hz…16 kHz | off | 12 dB/oct (11.7). |
| EQ high cut | off, 20 Hz…20 kHz | off | 12 dB/oct. |
| EQ bells | two: 20 Hz…16 kHz, −18…+18 dB, Q 0.3…6 | flat, at 250 Hz and 3 kHz, Q 1 | Pro Tools’ Low-Mid and High-Mid in Clip EQ. |
| Alloy | on / off | off | Spot, Bloom and Contour (11.11). |
| Scatter voice | Fall / Swarm | Fall, Arc peaking at 100/s | The stage’s corner. |
| Scatter Length | 0.02…4 s | 0.5 s | How long each particle is heard. |
| Throw | 0…100% | 100% | Fall. |
| Bounce | 0…100% | 0% | Fall. |
| Float | 0…100% | Fall 0%, Swarm 100% | Each voice keeps its own. |
| Life | 0…100% | 50% | Swarm. |
| Speed | 0…100% | 50% | Swarm. |
| Attack | Auto / Sharp / Soft | Auto | How each particle’s sound starts. |
| Layers | 1…12 | 3, or the pins | Scatter layers. |
19.2 Shape defaults#
| Shape | Default length |
|---|---|
| Spot | 1.5 s |
| Bloom | 4.0 s |
| Contour | 4.0 s |
| Fill | 8.0 s |
| Scatter | 4.0 s |
| Clip | (length of your file) |
| Bed | 8.0 s, or the scene it is linked to |
Maximum event length is 30 seconds.
19.3 Pitch#
| Function | Range |
|---|---|
| Pitch variation (per event) | up to ±24 semitones |
| Scale quantisation correction | up to ±6 semitones (tritone) |
Scales available for quantisation: Off, Major, Natural Minor, Chromatic, Maj7, Min7, and Power (1–5) — each with a selectable root note.
19.4 Spectral weight bands#
| Band | Frequency range |
|---|---|
| Sub | 20–150 Hz |
| Low | 150–750 Hz |
| Mid | 750–2000 Hz |
| High | 2000–6000 Hz |
| Air | 6000 Hz and above |
19.5 Busses and loudness#
| Bus | Default loudness target | Typical use |
|---|---|---|
| FX A | −16 LUFS | Hard, sync effects. |
| FX B | −25 LUFS | Support, sweeteners, designed layers. |
| FX C | −48 LUFS | Backgrounds and beds. |
| Mixer control | Range | Default |
|---|---|---|
| Declared tracks per slot | 1…48 | 8 |
| Bus & master faders | 0 dB at 80% of travel | 0 dB |
| Reference bus level | — | 0 dB |
Bus track slots are a declared shape, not a budget: they never cap a bus and no layer is ever muted to fit one. Tracks are created as the work needs them; fitting to a track count happens at delivery, by combining layers rather than dropping them (14.8). Loudness normalisation is applied as clip gain (non-destructive) and travels into the AAF.
19.6 Reverb#
| Knob | Range | Default |
|---|---|---|
| Size | 0–1 | 0.5 |
| Decay | 0–1 | 0.5 |
| Damp | 0–1 | 0.5 |
| Pre-Dly | 0–200 ms | 15 ms |
| Diffuse | 0–1 | 0.5 |
| Mod | 0–1 | 0.03 |
The overall space is set by dragging the room view; each bus strip carries its own reverb send (see the Mixer, 13.1).
19.7 Project and export#
| Setting | Options | Default |
|---|---|---|
| Sample rate | 44.1 / 48 / 88.2 / 96 / 192 kHz | 48 kHz |
| Frame rate | 23.976 … 120 (locks to a loaded video) | 24 |
| AAF handles | off (baked) / on (editable), fixed length or full source | on, 1.0 s |
| WAV bounce | Mix / Stems / Tracks / Clips (any combination) | Mix |
| WAV layout | Stereo / 5.1 / 7.1.4 / AmbiX (Mix and Stems) | Stereo |
| WAV normalize | Off / −14 / −16 / −18 / −23 LUFS (Mix only) | Off |
| Session format | AAF / REAPER / Pro Tools | AAF |
| Markers | on / off (in a REAPER project, a region per event) | off |
| Clip gain | on / off | on |
| EQ in a session | on / off (every WAV carries the EQ) | on once an event has EQ |
| Channels | conform to layout / keep source channels | conform to layout |
| Tracks | multi-mono / multichannel (AAF and Pro Tools) | multichannel |
| Reverb wet stem | on / off | off |
| WAV bit depth | 24-bit Broadcast WAV | — |
19.8 Auto-save#
| Setting | Range | Default |
|---|---|---|
| Auto-save | on / off | on |
| Interval | 1 / 2 / 5 / 10 / 15 / 30 min | 5 min |
| Backups kept | 10 (fixed) | 10 |
20. How Do I…?#
Short answers to the questions that come up in a first week, each pointing to the section that explains it properly.
…put a whoosh on a cut? Park the playhead on the cut and press 2 for a Bloom — a sound built around a sync point, swelling into it and decaying away. Type whoosh into Keywords, then drag the sync point on the Intensity curve so the peak lands on the cut. For a whoosh that travels and changes as it goes, press 3 for a Contour and draw its curves instead (4.2, 11.1).
…make a hit land exactly on a frame? Click the timecode in the transport bar, type the frame, and press 1 for a Spot. Its sound’s onset is aligned to the sync point, and every time operation snaps to the frame; the comma and period keys nudge it one frame either way. Pitch variation never moves it — a pitched-down hit still lands on its frame (5.5, 8.6, 9.1, 11.5).
…spot a whole reel from my Pro Tools markers? Drop memory-location markers in Pro Tools, name them with the marker grammar — bloom, low, +metal -ring, or the name of a recipe — and export Session Info as Text. Load the file from the Markers card in the Trace tab and import the moments as events (10.2, 10.5).
…make a background follow a scene? Set a work area with I and O and press S, then name the scene. The Set Background… chooser opens on its own: pick Empty Fill, Empty Bed, or a saved background recipe. Resize the scene and the background follows, crossfades included (9.3, 11.8).
…get a different sound for one layer? Expand the event in the Event List and use that layer’s previous and next arrows. Only that layer changes; nothing is rebuilt. For a fresh reading of the whole event, use the rebuild button in the inspector’s top row, or unlock it and Build (4.8, 11.1, 11.4).
…keep a sound I like? Select Like on its layer row. A pinned sound survives every re-roll and rebuild of that event, and the blue pin beside the recipe button lists what is pinned. To keep a whole event exactly as it is, leave it locked; to commit it for good, Bounce to Clip (4.8, 11.4, 11.10).
…ban a sound? Select Ban on its layer row (Unban brings it back). That file is gone from the entire project, in every event and on every re-roll. To keep a whole kind of material out of one event, use an exclude term in its keywords: -wood (8.1, 11.4).
…make an event heavier or brighter? Drag its Weight curve down in the inspector for heavier, up for brighter, or paint it in draw mode (D) so it travels over time. Heaviness is tone, so it is Weight, not Intensity: more Intensity means more layers, and usually more clutter. To make an event come through a busy moment, mark it Hero (8.2, 8.4, 11.1).
…change an event’s shape after placing it? Select it, and in the corner of the Intensity curve in the inspector select another shape in its family — Spot, Bloom or Contour, or Fill or Bed. Each shape keeps its own curves and sound, so switching back gives you what it was. To draw a Bloom, draw on it on the timeline: it becomes a Contour from the arc you see. One Undo switches it back (4.2, 9.5, 11.1).
…follow a new cut of the picture? Drop the new version on the project, or choose File › Import Video…. Every event moves to where its picture went; the ones to look at turn yellow, and Shift+Up and Shift+Down step through them. Fit to Cut splits an event across a changed edit, and Cmd+Z undoes the whole update (10.6).
…send the session to Pro Tools? In the Export tab turn on Session, choose Format: Pro Tools, keep Handles on so the fades arrive editable, and export. Open the .ptx: tracks in folders by bus, clip gain and Clip EQ already on the clips. If you would rather import an AAF into a session you already have, choose Format: AAF, then in Pro Tools Clip ▸ Convert Volume Automation to Clip Gain moves the balance onto the clips (14.1, 14.5).
…send it to REAPER? The same, with Format: REAPER. You get an .RPP with a folder track per bus, handles, fades and clip gain on every item; with Markers on, each event becomes a region named after it (14.1).
…deliver stems? Turn on WAV Bounce and choose Stems — one file per bus, written dry — and set Layout to stereo or a surround format. With the reverb on, turn on Wet stem to deliver it beside them (14.2, 14.4).
…deliver to my mixer’s track layout? Declare the tracks on each bus card in the Project tab, or build them with Import track list… from a Pro Tools session text or a REAPER project. The export then arrives in exactly those tracks, folding rather than dropping where it must; click the button at the bottom of the timeline to hear the delivery first (14.8, 15.2, 15.3).
…set loudness per bus? Each bus card in the Project tab carries its target loudness, and Normalize settles the busses there while you work, as adjustable clip gain. The Mixer faders balance on top of it. The Normalize in the Export tab is a separate, final pass on the Mix alone (13.1, 14.2, 15.1, 15.4).
…monitor in 5.1, or on headphones? In Settings, set Format to a speaker layout your interface can carry, or to Headphones (binaural) — a check on panning, not a delivery render. To move one sound in the room, select it and press P for the Panner (11.6, 16.2).
…turn an event into an Alloy? Select a Spot, Bloom or Contour and select the Alloy button at the end of the inspector’s top row, or right-click it and choose Alloy. A built event keeps the sounds it has, now as three drawers and a Shape; turn Alloy off to get the layers back (11.11).
…make a rain or debris cloud? Press 5 for a Scatter, type rain or debris, and leave the voice on Fall. The Intensity lane sets how many land per second; Throw, Bounce and Float set how they fall, and Attack on Sharp keeps every hit crisp. Several Scatters layered make a richer cloud — save them as a chain (11.13).
…reuse an event later? Save it as a recipe from the inspector’s tool column, and place it again with the recipe/chain placement button in the transport bar, in this project or any other. For a gesture of several events, group them and save the group as a Chain from its menu (4.6, 11.1, 11.3).
…recover after a crash? Leave Auto-save on. If the application does not shut down cleanly, it says so on the next launch and points you to the newest backup in the project’s Backups folder; open it like any project, duplicating it first to keep the rotation intact. A save that was interrupted never corrupts the project (17.1, 17.3).
21. A Short Glossary#
Event — a single intended sound on the timeline, with a shape and settings.
Shape — the kind of gesture an event is. Seven shapes, presented in families: the figure shapes (Spot, Bloom, Contour), the ground shapes (Fill, Bed), Scatter on its own, and Clip, your own file. Five are intent, cast from your library; Bed and Clip are fixed, and play files you choose (4.2).
Figure — the shapes for things that happen: Spot, Bloom and Contour. From figure and ground in perception, what you attend to.
Ground — the shapes for what lies under: Fill and Bed. What the figure stands on. Any shape can serve either purpose in practice; the families describe how a sound behaves, not where it sits.
Scatter — a particle system: a cloud of short hits that fall and land (Fall) or creatures that call (Swarm), its density drawn as the Intensity curve (11.13).
Alloy — one sound made of four from your library: three heard in fixed bands, low, mid and high, and a fourth, the Shape, whose movement rides them all (11.11).
Picture Conform — the project following a new cut of the picture: drop it in and every event, scene and background goes where its picture went (10.6).
Weight — where in the spectrum an event should sit, drawn as a curve. Shown across five bands (Sub, Low, Mid, High, Air) but set as a smooth, continuous focus.
Intensity — an event’s energy over time, drawn as a curve.
Build — assembling sound from your library onto the timeline. Internal to the project; non-destructive and repeatable.
Export — writing finished files (a Pro Tools session, an AAF, a REAPER project, or WAV) to disk for your DAW.
Layer — one of the individual sounds that make up a built event. Each layer can be auditioned, stepped through its alternatives, pinned, or banned from its row in the event list. An event never plays the same file twice: every layer, and every stretch of a layer, is a sound of its own.
Pin / Ban — pinning (Like) fixes a sound as a permanent choice for an event; banning (Ban) removes a sound from the whole project. Together they steer a project toward your taste over time. An event with pins shows a blue pin beside the recipe button, with a small dot when some pinned sound is not in the current build. Click it for the list, one line per pinned sound: click the name to hear it, the × at the end of the line to unpin it. A sound that is not heard says why, dimmed, before the × (banned, file missing, or simply not in this build — outranked, or over the layer count). Unpin all is at the bottom.
Hero — an event marked as a priority (11.1). It is allowed a little more density, deconfliction protects it and makes the surrounding material give way, and it is among the last things folded at delivery.
Deconfliction — the automatic process that keeps a busy timeline legible: separating timing, sharing out the spectrum, and containing density so layers do not mask each other. No filtering is involved.
Recipe — a saved event of any shape, ready to place again. An intent recipe rebuilds from your library; a Clip or Bed recipe returns the files you saved.
Chain — a saved group of linked events, rebuilt fresh from your library when placed.
Universal Category System (UCS) — Sonic Alchemist reads it from your library, proposes recipe and variation names with it, and writes it into exported takes. Category identifiers are used as the standard defines them.
Palette — an indexed folder of your sounds, or a saved selection, in the Library.
Scene — a region of the timeline that structures it and carries a conforming background.
Fill — an event that is a continuous bed of sound, cast from your library and following its Weight curve; when linked to a scene, it conforms to the scene’s length.
Bed — a background made from specific files you choose. Like a Clip, it is your own material rather than a match — a set of files filled to a scene the way a Fill fills one, with no spectral movement and its Intensity curve acting as volume.
Trace — reading light and motion in the picture, or imported Pro Tools markers, to mark moments for events. Measurement, not recognition.
Panner — where an event plays (11.6): the room seen from above, its five speakers where they are drawn, and a height slider. Untouched, an event sits on C and plays as it is. Multichannel sources always conform by role, and the Panner never moves them.
Declared tracks — the slots on a bus card: a count and format list that says what the bus delivers. Never a cap on the session; the delivery is fitted to it at export (14.8). A bus that declares nothing delivers at full width.
Fold — combining overlapping layers into one clip at delivery, when a bus declares fewer tracks than the moment used. Never crosses a bus, never drops material, and every folded clip can be opened back into its layers with Unbounce to Source (14.8).
Missing sources — the Library area that gathers file references which could not be found, with Locate and Relink controls. Files that have merely moved heal on their own; a missing source never blocks opening or building.
Lock — protecting an event so subsequent builds leave it unchanged.
Unbounce — opening a printed sound back up into what made it: Unbounce to Source for the exact layers, Unbounce to Recipe for a fresh build of the same intent. Works on a bounce, a delivered file, a folded clip, or a whole session coming back as an AAF (11.10, 17.5).
22. Acknowledgements#
Since the early 2000s I have been going to the School of Sound in London — a rare gathering where sound people step back from the tools and talk about meaning, listening, and why any of this matters. More than any piece of software, it shaped how I think about the work.
Every so often, Larry and Diane Sider would bring up a line there that has stayed with me ever since:
In the beginner’s mind there are many possibilities, but in the expert’s there are few.
— Shunryu Suzuki, Zen Mind, Beginner’s Mind
It names the exact trap this tool was built against: the expert’s worn path, the same keywords, the same results. Sonic Alchemist is, in the end, an attempt to keep a beginner’s mind while working with an expert’s hands. My thanks to Larry and Diane, and to everyone at the School of Sound, for keeping that idea alive.
Many thanks to James Currie and everyone at Griffith Film School Brisbane, to everyone at the National Film School (LMTA / Lithuanian Academy of Music and Theatre), and to Midge Costin, Anthony Gibson, Ross Williams, Tomas Blazukas, James David Redding III, Arturas Pugaciauskas, Julius Grigelionis for your support at various stages of this project.
And to everyone I have learned from across twenty years — the sound editors, designers, and mixers, but also the directors, writers, musicians, tool makers, and thinkers — thank you. For the conversations, the films, the art; for the impressive and the mundane behind every intention. This tool is for you, and it only makes sense in your hands.
This would not be possible without my family. Ačiū.
Beginner’s mind.
© 2026 Vytis Puronas MPSE · Sonomagic · Vilnius, Lithuania